Make a Picture Voting Game with Node.js (Part 2)
In the first part of this tutorial, we laid down the foundation of our node.js web app. You learned about running and installing node, about npm and the nedb library, and we even wrote our first module. This week we will continue with the routes and views of our picture voting app.
The Routes and Configuration Files
Last week we made a module that handles the initialization of two datasets - users and photos. These datasets were exported by the module, which allows us to require it and access them in our other js files. We will do this is in our routes.js file, which holds all the routes that the application will respond to.
routes.js
/**
 * This file defines the routes used in your application
 * It requires the database module that we wrote previously.
 */

var db = require('./database'),
    photos = db.photos,
    users = db.users;

module.exports = function(app){

    // Homepage
    app.get('/', function(req, res){

        // Find all photos
        photos.find({}, function(err, all_photos){

            // Find the current user
            users.find({ip: req.ip}, function(err, u){

                var voted_on = [];

                if(u.length == 1){
                    voted_on = u[0].votes;
                }

                // Find which photos the user hasn't still voted on

                var not_voted_on = all_photos.filter(function(photo){
                    return voted_on.indexOf(photo._id) == -1;
                });

                var image_to_show = null;

                if(not_voted_on.length > 0){
                    // Choose a random image from the array
                    image_to_show = not_voted_on[Math.floor(Math.random()*not_voted_on.length)];
                }

                res.render('home', { photo: image_to_show });

            });

        });

    });

    app.get('/standings', function(req, res){

        photos.find({}, function(err, all_photos){

            // Sort the photos

            all_photos.sort(function(p1, p2){
                return (p2.likes - p2.dislikes) - (p1.likes - p1.dislikes);
            });

            // Render the standings template and pass the photos
            res.render('standings', { standings: all_photos });

        });

    });

    // This is executed before the next two post requests
    app.post('*', function(req, res, next){

        // Register the user in the database by ip address

        users.insert({
            ip: req.ip,
            votes: []
        }, function(){
            // Continue with the other routes
            next();
        });

    });

    app.post('/notcute', vote);
    app.post('/cute', vote);

    function vote(req, res){

        // Which field to increment, depending on the path

        var what = {
            '/notcute': {dislikes:1},
            '/cute': {likes:1}
        };

        // Find the photo, increment the vote counter and mark that the user has voted on it.

        photos.find({ name: req.body.photo }, function(err, found){

            if(found.length == 1){

                photos.update(found[0], {$inc : what[req.path]});

                users.update({ip: req.ip}, { $addToSet: { votes: found[0]._id}}, function(){
                    res.redirect('../');
                });

            }
            else{
                res.redirect('../');
            }

        });
    }
};
Here app is an instance of an Express.js web application that we will create in our index.js file. We are exporting a function which takes the app as an argument, which allows us to inject it as a dependency later on.
The next file that we will write, is a configuration file that sets some settings for our application:
config.js
/**
 * This file runs some configuration settings on your express application.
 */

// Include the handlebars templating library
var handlebars = require('express3-handlebars'),
    express = require('express');

// Require()-ing this module will return a function
// that the index.js file will use to configure the
// express application

module.exports = function(app){

    // Register and configure the handlebars templating engine
    app.engine('html', handlebars({
        defaultLayout: 'main',
        extname: ".html",
        layoutsDir: __dirname + '/views/layouts'
    }));

    // Set .html as the default template extension
    app.set('view engine', 'html');

    // Tell express where it can find the templates
    app.set('views', __dirname + '/views');

    // Make the files in the public folder available to the world
    app.use(express.static(__dirname + '/public'));

    // Parse POST request data. It will be available in the req.body object
    app.use(express.urlencoded());

};
We are using the handlebars templating engine for our views (with the help of this adapter library), because it is easy to write and supports layout views. A layout will allow us to share a common design for all our pages, which is a big time saver. The code above also uses the static connect middleware to serve the files in the /public folder. This is the best way to make all the site assets accessible from a web browser.
The next file is index.js, which ties all of these modules together, and initializes a new Express.js application for us:
index.js
/**
 * This is the main file of the application. Run it with the
 * `node index.js` command from your terminal
 *
 * Remember to run `npm install` in the project folder, so
 * all the required libraries are downloaded and installed.
 */

var express = require('express');

// Create a new express.js web app:

var app = express();

// Configure express with the settings found in
// our config.js file

require('./config')(app);

// Add the routes that the app will react to,
// as defined in our routes.js file

require('./routes')(app);

// This file has been called directly with
// `node index.js`. Start the server!

app.listen(8080);
console.log('Your application is running on http://localhost:8080');
Great! Our app is taking shape! To start it, execute the command node index.js, and the server will start listening on port 8080. However, if you try opening http://localhost:8080, it in your browser at this point, you will only see error messages for missing template files. This is because we haven't yet written our views.
The Views
The first view that we will create, is the layout. This file will define the common HTML that is shared by the other pages of our site. Your app may have more than one layout (for example if you wish to have separate designs for your home page and for your administration screens), but we will only have one here.
views/layouts/main.html
<!DOCTYPE html>
<html>

    <head>
        <meta charset="utf-8"/>
        <title>Node.js Picture Voting Game</title>

        <meta name="viewport" content="width=device-width, initial-scale=1" />

        <link href="http://fonts.googleapis.com/css?family=Open+Sans:300,700" rel="stylesheet" />
        <link href="css/styles.css" rel="stylesheet" />

    </head>

    <body>

        <header>
            <h1><span class="green">Cute</span> or <span class="red">NOT?</span></h1>
            <h2>A Node.js Voting Game</h2>
        </header>

        {{{body}}}

        <footer>
            <a class="tz" href="https://tutorialzine.com/2014/01/nodejs-picture-voting-game-part-1/">Tutorial: Node.js Picture Voting Game</a>

    </body>
</html>
The {{{body}}} tag is automatically replaced by the HTML of the other views that use this layout. Here is the HTML specific to the index page:
views/home.html
<nav>
    <a class="active" href="./">Game</a>
    <a href="./standings">Standings</a>
</nav>

{{#if photo}}

    <img src="photos/{{photo.name}}" width="530" height="420" alt="Cat Picture" />

    <div class="button-holder">
        <form action="./cute" method="post">
            <input type="hidden" name="photo" value="{{photo.name}}" />
            <input type="submit" value="Cute!" />
        </form>
        <form action="./notcute" method="post">
            <input type="hidden" name="photo" value="{{photo.name}}" />
            <input type="submit" value="Not Cute!" />
        </form>
    </div>

{{else}}

    <h3>No more photos to vote on! Check out the <a href="./standings">standings</a>.</h3>

{{/if}}
Handlebars templates can have if/else constructs, loops and lots of other features that allow you to write clean HTML. And here is the template for the standings page:
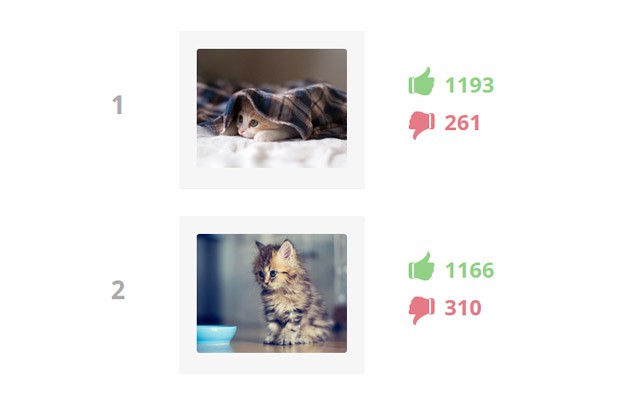
views/standings.html
<nav>
    <a href="./">Game</a>
    <a class="active" href="./standings">Standings</a>
</nav>

{{#if standings}}

    <ul>

        {{#each standings}}

        <li>
            <img src="photos/{{name}}" alt="Cat picture thumbnail" />
            <p class="up">{{this.likes}}</p>
            <p class="down">{{this.dislikes}}</p>
        </li>

        {{/each}}

    </ul>

{{/if}}
By using templates we are able to separate the code for presenting the data from the data itself. You can use many different template engines in your express web application.
We're Done!
With this, our Node.js picture voting game is complete! You can enhance it with some of the countless node.js modules and libraries and modify it in any way that you wish. I hope that you found this tutorial useful! If you have any suggestions, bring them to the comment section below.
Bootstrap Studio
The revolutionary web design tool for creating responsive websites and apps.
Learn more
How are you passing the IP address onto the visitor? If I run the node app at the port like domain:8080 it works fine, but when i use an Apache using Proxypass it doesn't pass the IP, so if i vote on all the pictures from my IP, and I give the URL to someone else, it shows them that all images have been voted on, curious on your setup how you do this.
To everyone who is reading this, if you run into this problem, simply add this setting to your config.js file:
app.enable('trust proxy');When you run your node.js app behind Apache or Nginx, your app will always get 127.0.0.1 as the IP address of the visitor. Adding the 'trust proxy' setting tells express.js to work around this problem.
thanks for the trust proxy tip, i hacked together a startup script so the nodeapp starts on boot
https://gist.github.com/chrismccoy/8662211
Node.js is really powerful! Thanks for sharing.
Could you talk a little bit about deployment strategies? I'd be interested in a controlled host (e.g., Bluehost), or generally anywhere without sudo or apache, or a cloud based solution.