Making Your First HTML5 Game With Phaser
Everybody loves classic games. How many of you remember the retro snake game from old Nokia phones? We sure do. This is why for this lesson we decided to recreate it using HTML5. There is a great open source game development framework called Phaser that we will use.
You will learn about sprites, game states and how to use the preload, create and update methods. Here's what the final version of the game we're building looks like:

Setup
Download a zip archive with the file structure of the game here. It contains all the image assets needed for the game but no code. We will be writing this next.
Now open index.html, add a title for your page and create links to all the JS files. Later, to play the game, just open this file in your browser.
<!doctype html>
<html>
<head>
    <meta charset="UTF-8" />
    <title>Snake</title>
    <script src="assets/js/phaser.min.js"></script>
    <script src="assets/js/menu.js"></script>
    <script src="assets/js/game.js"></script>
    <script src="assets/js/game_over.js"></script>
    <script src="assets/js/main.js"></script>
</head>
<body>

</body>
</html>
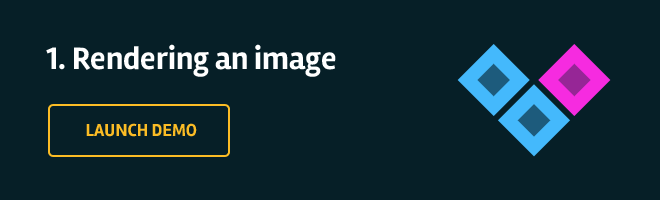
Your directory should look like this:
How the game is organized
Phaser games are organized around states. Think of states in Phaser as the different parts of a game. Here are the states of our game:
- The Menu state. It is handled by menu.js, and only displays the start image. When it is clicked, the game transitions to the Game state.
- Game state. It is handled by game.js. This is the actual play area of the game. You control the snake, eat apples and have lots of fun. When you die, you transition to the Game_Over state.
- Game_Over state. It shows gameover.png and displays your last score. When it is clicked you transition to the Game state.
main.js is our main JavaScript file. This is the place where we will create a new game instance and add a menu state.
1. Loading an image
Right now, our game doesn't do anything. Let's code the Menu state, and make it display the title screen.
During the setup we included the Phaser library in our HTML file. This gives us a global object called Phaser. Through it, we can access the library's methods and functions for building games.
Now we will use the global Phaser object, and create a new game instance. This is an object which represents our entire game. We will add the states to it.
main.js
var game;

// Create a new game instance 600px wide and 450px tall:
game = new Phaser.Game(600, 450, Phaser.AUTO, '');

// First parameter is how our state will be called.
// Second parameter is an object containing the needed methods for state functionality
game.state.add('Menu', Menu);

game.state.start('Menu');
Now we need to initialize our Menu state object. In menu.js define a new object and add the functions below. When the state is started, the preload function will be called first, loading all the needed assets for our game. Once preloading finishes, create gets called, initializing the playing field and everything we want on it:
menu.js
var Menu = {

    preload : function() {
        // Loading images is required so that later on we can create sprites based on the them.
        // The first argument is how our image will be refered to,
        // the second one is the path to our file.
        game.load.image('menu', './assets/images/menu.png');
    },

    create: function () {
        // Add a sprite to your game, here the sprite will be the game's logo
        // Parameters are : X , Y , image name (see above)
        this.add.sprite(0, 0, 'menu');
    }

};
Because of browser security restrictions, to start the game you'll need a locally running web server. This page from the Phaser guidelines has plenty of options for all operating systems - here. In other words, it won't work if you simply double click your index.html.
If everything has been done right, a page with the the start screen should appear in your browser.
2. Drawing the snake
As we mentioned earlier, the Game state is where the actual game play happens. This is also the place where we will draw the snake. Like we did with the Menu state, we need to register the Game state with the global game object in main.js. Here is how your code should look like:
main.js
var game;

game = new Phaser.Game(600, 450, Phaser.AUTO, '');

game.state.add('Menu', Menu);

// Adding the Game state.
game.state.add('Game', Game);

game.state.start('Menu');
We'll also want to add some code in menu.js to let us start the Game state when it is clicked. For this purpose, we will replace the sprite with a button. Adding a button is basically the same as adding a sprite, you only need to provide a function to be called when it is clicked. Here is the final menu.js code:
menu.js
var Menu = {

    preload : function() {
        // Load all the needed resources for the menu.
        game.load.image('menu', './assets/images/menu.png');
    },

    create: function () {

        // Add menu screen.
        // It will act as a button to start the game.
        this.add.button(0, 0, 'menu', this.startGame, this);

    },

    startGame: function () {

        // Change the state to the actual game.
        this.state.start('Game');

    }

};
We can now proceed with coding the Game state and drawing the snake. The structure is similar to the one of the Menu state.
game.js
var snake, apple, squareSize, score, speed,
    updateDelay, direction, new_direction,
    addNew, cursors, scoreTextValue, speedTextValue,
    textStyle_Key, textStyle_Value;

var Game = {

    preload : function() {
        // Here we load all the needed resources for the level.
        // In our case, that's just two squares - one for the snake body and one for the apple.
        game.load.image('snake', './assets/images/snake.png');
        game.load.image('apple', './assets/images/apple.png');
    },

    create : function() {

        // By setting up global variables in the create function, we initialise them on game start.
        // We need them to be globally available so that the update function can alter them.

        snake = [];                     // This will work as a stack, containing the parts of our snake
        apple = {};                     // An object for the apple;
        squareSize = 15;                // The length of a side of the squares. Our image is 15x15 pixels.
        score = 0;                      // Game score.
        speed = 0;                      // Game speed.
        updateDelay = 0;                // A variable for control over update rates.
        direction = 'right';            // The direction of our snake.
        new_direction = null;           // A buffer to store the new direction into.
        addNew = false;                 // A variable used when an apple has been eaten.

        // Set up a Phaser controller for keyboard input.
        cursors = game.input.keyboard.createCursorKeys();

        game.stage.backgroundColor = '#061f27';

        // Generate the initial snake stack. Our snake will be 10 elements long.
        // Beginning at X=150 Y=150 and increasing the X on every iteration.
        for(var i = 0; i < 10; i++){
            snake[i] = game.add.sprite(150+i*squareSize, 150, 'snake');  // Parameters are (X coordinate, Y coordinate, image)
        }

        // Genereate the first apple.
        this.generateApple();

        // Add Text to top of game.
        textStyle_Key = { font: "bold 14px sans-serif", fill: "#46c0f9", align: "center" };
        textStyle_Value = { font: "bold 18px sans-serif", fill: "#fff", align: "center" };

        // Score.
        game.add.text(30, 20, "SCORE", textStyle_Key);
        scoreTextValue = game.add.text(90, 18, score.toString(), textStyle_Value);
        // Speed.
        game.add.text(500, 20, "SPEED", textStyle_Key);
        speedTextValue = game.add.text(558, 18, speed.toString(), textStyle_Value);

    },

    update: function() {
        // The update function is called constantly at a high rate (somewhere around 60fps),
        // updating the game field every time.
        // We are going to leave that one empty for now.
    },

    generateApple: function(){

        // Chose a random place on the grid.
        // X is between 0 and 585 (39*15)
        // Y is between 0 and 435 (29*15)

        var randomX = Math.floor(Math.random() * 40 ) * squareSize,
            randomY = Math.floor(Math.random() * 30 ) * squareSize;

        // Add a new apple.
        apple = game.add.sprite(randomX, randomY, 'apple');
    }

};
Here is how the snake and apple should look like:

3. Movement and control
To make the snake move we'll be working in the update function of game.js.
First of all, we create event listeners for controlling the direction of the snake with the arrow keys.
The actual movement is a bit complex, since update is triggered at a very quick rate, and if we move the snake every time it's called we would end up with one uncontrollably speedy reptile. To change this, we've set up an if statement that checks weather this is the 10th consecutive call of update() using a counter variable called updateDelay.
If it really is the 10th call, we remove the last square of our snake (first element in the stack), give it new coordinates according to the current direction and place it in front of the head of the snake (top of the stack). Here's how the code looks like:
update: function() {

    // Handle arrow key presses, while not allowing illegal direction changes that will kill the player.

    if (cursors.right.isDown && direction!='left')
    {
        new_direction = 'right';
    }
    else if (cursors.left.isDown && direction!='right')
    {
        new_direction = 'left';
    }
    else if (cursors.up.isDown && direction!='down')
    {
        new_direction = 'up';
    }
    else if (cursors.down.isDown && direction!='up')
    {
        new_direction = 'down';
    }

    // A formula to calculate game speed based on the score.
    // The higher the score, the higher the game speed, with a maximum of 10;
    speed = Math.min(10, Math.floor(score/5));
    // Update speed value on game screen.
    speedTextValue.text = '' + speed;

    // Since the update function of Phaser has an update rate of around 60 FPS,
    // we need to slow that down make the game playable.

    // Increase a counter on every update call.
    updateDelay++;

    // Do game stuff only if the counter is aliquot to (10 - the game speed).
    // The higher the speed, the more frequently this is fulfilled,
    // making the snake move faster.
    if (updateDelay % (10 - speed) == 0) {

        // Snake movement

        var firstCell = snake[snake.length - 1],
            lastCell = snake.shift(),
            oldLastCellx = lastCell.x,
            oldLastCelly = lastCell.y;

        // If a new direction has been chosen from the keyboard, make it the direction of the snake now.
        if(new_direction){
            direction = new_direction;
            new_direction = null;
        }

        // Change the last cell's coordinates relative to the head of the snake, according to the direction.

        if(direction == 'right'){

            lastCell.x = firstCell.x + 15;
            lastCell.y = firstCell.y;
        }
        else if(direction == 'left'){
            lastCell.x = firstCell.x - 15;
            lastCell.y = firstCell.y;
        }
        else if(direction == 'up'){
            lastCell.x = firstCell.x;
            lastCell.y = firstCell.y - 15;
        }
        else if(direction == 'down'){
            lastCell.x = firstCell.x;
            lastCell.y = firstCell.y + 15;
        }

        // Place the last cell in the front of the stack.
        // Mark it the first cell.

        snake.push(lastCell);
        firstCell = lastCell;

    }

}
Try and control the snake via the arrow keys on your keyboard.

4. Collision detection
A game in which the snake is roaming freely in the playing field is not much fun. We need to detect when the snake comes in contact with a wall, an apple or itself. This is called collision detection.
This is usually done by using a physics engine, of which the Phaser framework supports a few. But they are too complex for a simple game like this. We will instead do our own collision detection by comparing coordinates.
In the update function, after the code for moving the snake, we call a number of methods. They will compare coordinates to tell us if a collision has occurred.
update: function() {

        // Snake movement
        // ...
        // End of snake movement

        // Increase length of snake if an apple had been eaten.
        // Create a block in the back of the snake with the old position of the previous last block
        // (it has moved now along with the rest of the snake).

        if(addNew){
            snake.unshift(game.add.sprite(oldLastCellx, oldLastCelly, 'snake'));
            addNew = false;
        }

        // Check for apple collision.
        this.appleCollision();

        // Check for collision with self. Parameter is the head of the snake.
        this.selfCollision(firstCell);

        // Check with collision with wall. Parameter is the head of the snake.
        this.wallCollision(firstCell);
    }

},

appleCollision: function() {

    // Check if any part of the snake is overlapping the apple.
    // This is needed if the apple spawns inside of the snake.
    for(var i = 0; i < snake.length; i++){
        if(snake[i].x == apple.x && snake[i].y == apple.y){

            // Next time the snake moves, a new block will be added to its length.
            addNew = true;

            // Destroy the old apple.
            apple.destroy();

            // Make a new one.
            this.generateApple();

            // Increase score.
            score++;

            // Refresh scoreboard.
            scoreTextValue.text = score.toString();

        }
    }

},

selfCollision: function(head) {

    // Check if the head of the snake overlaps with any part of the snake.
    for(var i = 0; i < snake.length - 1; i++){
        if(head.x == snake[i].x && head.y == snake[i].y){

            // If so, go to game over screen.
            game.state.start('Game_Over');
        }
    }

},

wallCollision: function(head) {

    // Check if the head of the snake is in the boundaries of the game field.

    if(head.x >= 600 || head.x < 0 || head.y >= 450 || head.y < 0){

        // If it's not in, we've hit a wall. Go to game over screen.
        game.state.start('Game_Over');
    }

}
When the snake collides with the apple we increase the score and the length of the snake. But when a collision with the wall or the snake body occurs, we should end the game. To do this, we need to make the Game_Over state. Again, we need to register it with main.js. Add this line near the bottom of that file:
main.js
game.state.add('Game_Over', Game_Over);
And the state itself:
game_over.js
var Game_Over = {

    preload : function() {
        // Load the needed image for this game screen.
        game.load.image('gameover', './assets/images/gameover.png');
    },

    create : function() {

        // Create button to start game like in Menu.
        this.add.button(0, 0, 'gameover', this.startGame, this);

        // Add text with information about the score from last game.
        game.add.text(235, 350, "LAST SCORE", { font: "bold 16px sans-serif", fill: "#46c0f9", align: "center"});
        game.add.text(350, 348, score.toString(), { font: "bold 20px sans-serif", fill: "#fff", align: "center" });

    },

    startGame: function () {

        // Change the state back to Game.
        this.state.start('Game');

    }

};

That's it! Our game is ready!
Further reading
We hope that you liked our simple game and learned a lot while following our tutorial. There is much more to learn about Phaser:
Bootstrap Studio
The revolutionary web design tool for creating responsive websites and apps.
Learn more
Nice tutorial!
Like the explanation but I have a little question about this part
// By setting up global variables in the create function, we initialise them on game start.
// We need them to be globally available so that the update function can alter them.
Wouldn't it be better if you would would bind the variable to the Game object?
by doing this.snake you wouldn't need any global variables.
Thanks for the suggestion! This would make the code a bit cleaner. We should do this for our next game.
Hi Danny, could you elaborate more on the concept of binding variables to the game object? Also when I define a variable in one state, they are available in all others too, which doesn't make sense to me. I'm creating states with functions and initializing with its prototype.
The game object is available to all states and functions within the states. This is because it is the upper most parent in the Phaser hierarchy and is used all the time (to add sprites, to change background color, to add the states themselves even). The guys at Phaser have made it globally accessible with the game (or this) keyword.
By adding our own variable to the game object, we make it reachable by any code that can reach game, which is all of the code.
Let's say we want to keep track of points. Initializing is done by extending the already existing game object.
game.points = 0;From then on, setting and getting is done the exact same way.
The availability of your variables in the states, should follow the basic scope mechanics of JavaScript.
Good topic!!
I think phaserJS is powerful framework and very futurely!!
:D
Excellent tutorial ! :) If I had to continue the snakes movement from opposite side of wall it hits (same x- co-ordinate), what all do I need to change? Thanks :)
First, you'll have to remove the handler for wall impact, since it stops the game when the snake moves out of the field.
Then, to actually transport the snake from one side to the other, you'll need to modify the algorithm for snake movement in update() of game.js.
modify the wallCollision function, so doesn't cause a game over but instead toggles a variable:
if(head.x >= 600 || head.x < 0 || head.y >= 450 || head.y < 0){
this.isOutsideBounds = true;
} else {
this.isOutsideBounds = false;
}
then, in the update function, add a few lines to each movement:
if(direction == 'right'){
lastCell.x = firstCell.x + 15;
lastCell.y = firstCell.y;
}
else if(direction == 'left'){
lastCell.x = firstCell.x - 15;
lastCell.y = firstCell.y;
}
else if(direction == 'up'){
lastCell.x = firstCell.x;
lastCell.y = firstCell.y - 15;
}
else if(direction == 'down'){
lastCell.x = firstCell.x;
lastCell.y = firstCell.y + 15;
if(this.isOutsideBounds) lastCell.y = game.world.bounds.y; // 0
}
Hi! Great tut, but when I want to add second game.state.add ( game.state.add('Game', Game); ) in main.js my game breaks down, why?
And when I commend this line, menu loading well.
Hi Adrian, game.state.add() receives two arguments, first is the name of the new state (a string - 'Game') and the second one is an object containing the necessary Phaser functions, in our case also called Game.
What is happening is, you are trying to add the new state, before you've defined the Game object, resulting in a JavaScript error. To resolve this, follow the instructions related with game.js, where we define the needed object, and then run the game.
Thank you for writing this great article, everything was really clear and fun to make !
Great tutorial as always. Had a lot of fun playing the game coded by myself. :D
Brilliant! Love the tutorial. I've just started exploring Phaser.io and this tutorial is by far the best I came across. Thanks one again.
I am new to Phaser, I see in some tutorials people use "this" keyword but sometimes they don't use it. When to use it?
For example:
this.add.button(0, 0, 'gameover', this.startGame, this); ......and..........
apple = game.add.sprite(randomX, randomY, 'apple');
FINALLY made this example work. That was though for me as a beginner. It never wanted to leave the menu screen. Deactivating it I got the meassage that 'head' was undefined. In the end I realized that the collision detection lines need to go inside the 'if (updateDelay % (10 - speed) == 0) {' curly braces. The tutorial seems to suggest the opposite.... Of course it's obvious afterwards ;-)
Still a good tutorial! But maybe you could make this point clear. Publishing the complete code could prevent this kind of misunderstanding too.
Regards
This is the same problem I ran into and yelled at my poor monitor about. You're right about it making sense after fixing it but if you don't really understand scoping it's hard to figure out that outside of updateDelay the variable firstCell is not scoped so the collision detection call is being passed an undefined variable.
Hi, can i use this source to make a social snake game, with facebook integration?
Sure Alan, go ahead :)
And anyway, thank you so much for the tutorial!
Thanks for your tutorial, it's very simple to understand it !
I would like to know if it's possible to make different textures for the head, the tail and the body when the snake turns ?
If it's possible can you tell me how can I do that please, because I have been searching for several days
Great tutorial, thank you!
One minor thing I noticed:
The "new_direction" variable is unnecessary. It was just a placeholder used to update "direction" later, but there's no need to wait. On the arrow key checks, just set the "direction" variable directly. It isn't used until the snake movement anyway, so just remove the "if(new_direction){...}" part.