Shiny Knob Control with jQuery and CSS3
In this tutorial we will be writing a jQuery plugin for creating a shiny knob control. Aptly named knobKnob, this plugin will use CSS3 transformations and jQuery's new event handling methods to give visitors of your website a new way of interactively choosing a value from a range.
Update: Thanks to ranyefet the plugin now works on mobile devices [changes].
The HTML
The HTML markup for the page is rather straightforward. We are only going to need a placeholder element for the control - the rest is going to be dynamically generated by the plugin. Just in case, here is the complete markup of the page:
index.html
<!DOCTYPE html>
<html>
<head>
<meta charset="utf-8" />
<title>Shiny Switches with CSS3 & jQuery | Tutorialzine Demo</title>
<!-- CSS stylesheets -->
<link rel="stylesheet" href="assets/css/styles.css" />
<link rel="stylesheet" href="assets/knobKnob/knobKnob.css" />
<!--[if lt IE 9]>
<script src="http://html5shiv.googlecode.com/svn/trunk/html5.js"></script>
<![endif]-->
</head>
<body>
<section id="main">
<div id="bars">
<div id="control">
<!-- The knob markup will go here -->
</div>
<!-- The colorful dividers will go here -->
</div>
</section>
<!-- JavaScript includes -->
<script src="http://code.jquery.com/jquery-1.7.1.min.js"></script>
<script src="assets/knobKnob/transform.js"></script>
<script src="assets/knobKnob/knobKnob.jquery.js"></script>
<script src="assets/js/script.js"></script>
</body>
</html>
First we include the latest version of jQuery, transform.js which levels cross-browser support of the CSS3 transform properties we will be using, the knobKnob plugin file and script.js, which pulls everything together.
The #control div is where the plugin markup will be generated. Below we will insert divs that will become the colorful bars around it. They are not part of the KnobKnob plugin, we will be showing them depending on the chosen value in the control. KnobKnob also comes with a stylesheet that determines the looks of the knob. You can see it included in the head section.
Now lets write this plugin!
The jQuery Code
You can find the plugin source files in the knobKnob folder. To use it in your project simply unzip it in your website's assets folder and include the files you find inside. Here is the actual plugin file:
assets/knobKnob/knobKnob.jquery.js
/**
 * @name        jQuery KnobKnob plugin
 * @author      Martin Angelov
 * @version     1.0
 * @url         https://tutorialzine.com/2011/11/pretty-switches-css3-jquery/
 * @license     MIT License
 */

(function($){

    $.fn.knobKnob = function(props){

        var options = $.extend({
            snap: 0,
            value: 0,
            turn: function(){}
        }, props || {});

        var tpl = '<div class="knob">\
                <div class="top"></div>\
                <div class="base"></div>\
            </div>';

        return this.each(function(){

            var el = $(this);
            el.append(tpl);

            var knob = $('.knob',el)
                knobTop = knob.find('.top'),
                startDeg = -1,
                currentDeg = 0,
                rotation = 0,
                lastDeg = 0,
                doc = $(document);

            if(options.value > 0 && options.value <= 359){
                rotation = currentDeg = options.value;
                knobTop.css('transform','rotate('+(currentDeg)+'deg)');
                options.turn(currentDeg/359);
            }

            knob.on('mousedown', function(e){

                e.preventDefault();

                var offset = knob.offset();
                var center = {
                    y : offset.top + knob.height()/2,
                    x: offset.left + knob.width()/2
                };

                var a, b, deg, tmp,
                    rad2deg = 180/Math.PI;

                knob.on('mousemove.rem',function(e){

                    a = center.y - e.pageY;
                    b = center.x - e.pageX;
                    deg = Math.atan2(a,b)*rad2deg;

                    // we have to make sure that negative
                    // angles are turned into positive:
                    if(deg<0){
                        deg = 360 + deg;
                    }

                    // Save the starting position of the drag
                    if(startDeg == -1){
                        startDeg = deg;
                    }

                    // Calculating the current rotation
                    tmp = Math.floor((deg-startDeg) + rotation);

                    // Making sure the current rotation
                    // stays between 0 and 359
                    if(tmp < 0){
                        tmp = 360 + tmp;
                    }
                    else if(tmp > 359){
                        tmp = tmp % 360;
                    }

                    // Snapping in the off position:
                    if(options.snap && tmp < options.snap){
                        tmp = 0;
                    }

                    // This would suggest we are at an end position;
                    // we need to block further rotation.
                    if(Math.abs(tmp - lastDeg) > 180){
                        return false;
                    }

                    currentDeg = tmp;
                    lastDeg = tmp;

                    knobTop.css('transform','rotate('+(currentDeg)+'deg)');
                    options.turn(currentDeg/359);
                });

                doc.on('mouseup.rem',function(){
                    knob.off('.rem');
                    doc.off('.rem');

                    // Saving the current rotation
                    rotation = currentDeg;

                    // Marking the starting degree as invalid
                    startDeg = -1;
                });

            });
        });
    };

})(jQuery);
The plugin takes a number of options as a parameter object - snap, value and turn:
- snap is a number of degrees that are snapped to zero. You can test this by slowly turning the knob down;
- value is the initial rotation of the knob (also in degrees);
- turn is a callback function that is called every time the knob is turned. Its only argument is a ratio (from 0 to 1) of the rotation. We will use this function in a moment to determine how many of the colorful dividers to show.
In the code above you can see that we are using the Math.atan2 function (as we did in the PointPoint plugin) to calculate the angle (in radians) between the mouse pointer and the center of the knob. By keeping track of the angle in the start and end position of the drag, we can determine how much to rotate the knob.
Later we are also using jQuery 1.7's new methods for manipulating event listeners - on and off.
Now lets see how we can use this plugin.
assets/js/script.js
$(function(){

    var colors = [
        '26e000','2fe300','37e700','45ea00','51ef00',
        '61f800','6bfb00','77ff02','80ff05','8cff09',
        '93ff0b','9eff09','a9ff07','c2ff03','d7ff07',
        'f2ff0a','fff30a','ffdc09','ffce0a','ffc30a',
        'ffb509','ffa808','ff9908','ff8607','ff7005',
        'ff5f04','ff4f03','f83a00','ee2b00','e52000'
    ];

    var rad2deg = 180/Math.PI;
    var deg = 0;
    var bars = $('#bars');

    for(var i=0;i<colors.length;i++){

        deg = i*12;

        // Create the colorbars

        $('<div class="colorBar">').css({
            backgroundColor: '#'+colors[i],
            transform:'rotate('+deg+'deg)',
            top: -Math.sin(deg/rad2deg)*80+100,
            left: Math.cos((180 - deg)/rad2deg)*80+100,
        }).appendTo(bars);
    }

    var colorBars = bars.find('.colorBar');
    var numBars = 0, lastNum = -1;

    $('#control').knobKnob({
        snap : 10,
        value: 154,
        turn : function(ratio){
            numBars = Math.round(colorBars.length*ratio);

            // Update the dom only when the number of active bars
            // changes, instead of on every move

            if(numBars == lastNum){
                return false;
            }
            lastNum = numBars;

            colorBars.removeClass('active').slice(0, numBars).addClass('active');
        }
    });

});
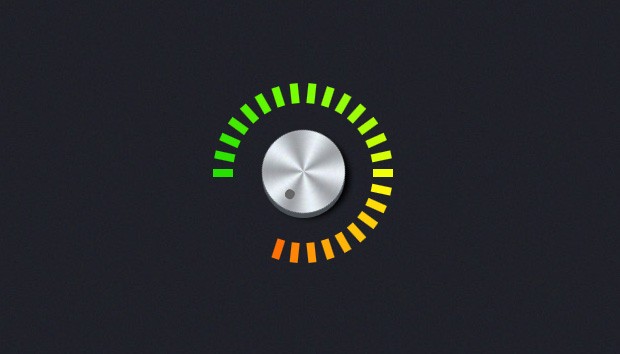
The colorful bars that are displayed around the knob are not part of the plugin. And they shouldn't be - the plugin only handles the control itself which makes it easier to reuse it.
The code above creates a set of 30 divs with colors gradually going from green to red. These are then rotated by 12 degree increments. Thanks to the turn callback function passed to the plugin, this code can determine how many of the colorful bars to show. You can see the rest of the bar styling in assets/css/styles.css.
We are done!
With this our plugin is complete! You can use it as part of control panels and other administrative pages, everywhere you want to give users the ability to choose from a pool of values. Next time we will use this plugin to enhance the new range form element.
Bootstrap Studio
The revolutionary web design tool for creating responsive websites and apps.
Learn more
Why not use some type of semantic form element for this? Maybe a range element? Something that degrades nicely, maybe?
Cool effect, though!
Yep, that is the idea. However I decided to split the tutorial in two parts. The plugin is discussed now, and next time we'll have a play with the range element.
Thanks for the tutorial. Now the problem is to find an excuse to use these on my site...
True that!
The lighting on the knob shouldn't rotate.
You are right, but it would be boring with only the small pointer moving.
Great tutorial! Just this week I was thinking adding a similar effect to a current project. You just saved me tons of work.
cool work
Put cursor pointer so that we know where to grab the button
Very nice plugin!) But why you did't make rotate animation more smoothly? ) Like
.stop().animate({....},250, 'easeInQuart');
I think, it will be better)
It doesn't use jQuery animations. It is all updated when you move your mouse.
If mouse out of knob when rotating, it doesn't rotate (
really useful for me ! Thanks for this tutorial :)
As I can use it for an audio player. I use have given? helpme
Nice use of css3 transform and your code is very interesting its help me to do a work on more concepts
I think the idea is great, and I was looking at something like this, however is there anyway you can change it so you can drag up and down, if you've ever used the DJing software called Traktor, then you will see it's quite a big usability factor!
Hope you can!
Thanks
You mean to increase/decrease the control by moving your mouse up and down? It is actually going to be easier, as you don't need to calculate angles and rotations.
Yup that's right, but it would have to go out of the radius of the knob, e.g.
^ O
v
If that makes sense?
Very nice and I didn't actually know you could do that with jQuery yet! Love it!
Impressive how nice works on iOS yet I can't integrate it to a current project I'm working on.
Maybe I'm missing something but how can I retrieve the value of current degree so that I can place three "icons" and let users choose using the knob one of the three "options".
Or just the basics, how can I tweek the "turn" callback to print to an the current value ?
Thanks for all the nice tuts you put out there.
p
Be sure to fetch the latest version of the plugin from github. After this, you can use the ratio that is passed to the turn callback function as you would Math.rand():
Guys can you please post some examples where you're using this knob? I'd like to take some ideas. Thanks :)
Love it. Sleek and smooth.
I do a lot of audio recording and design, and so many of the plugins are plagued with fake knobs and dials, and they all have one thing in common. They are terrible, terrible interfaces for mouse based control. Interface designers: stop it! No more.
Trying to use these on a site we are working on, and they work fine in standard browser, but when I checked on my iphone, I can't turn the dials :(... maybe resizing them messed something up..???
http://www.kingsfoodservice.com/SHAWNEE-SERVICES%20SITE/home.html
I just saw the update above. Once we add that it should work. On the site I posted earlier the dials will be the nav bar obviously, the page you are on will load to 95% all others to 50%, with page load on click release. Still really rough with alot of place holders and only the one page, but should be much closer by the end of the week.
How to use the knob to control system volume?
Possible to have the knob auto rotate endlessly? And then stop when moused down to manually control?
How would I change the background for multiple knobs on each page? Looks like the .knob and the .top class divs are being appended via js and the css background image knob.png is applied to .knob ,top
it's a pity the knob doesnt load properly in SAFARI...anyone found any solution?
great, but, not very usable !
it isn't necessarily the best solution to copy something directly from real life on a computer.
try making it so a straight up and down motion rotates the knob entirely rather than having to trace it in a circle ... this is how programs like Propellerheads Reason solve the same problem.
Thks so much ! it's very helpful
Turn it up to 11 :)
cool stuff. now pandora just needs to use this...
Awesome code.
Hi, excellent work, thanks a lot.
I need to have more than one knob, can u help me how can i have more knobs.
Hi, great script.
Any guides, ideas or tips on how to have two knobs, one big on the back, and a smaller on the front, and that both knobs can rotate?
Thanks
Hi,
I posted a question, but i didn't got the reply, i think we cannot have more than one knob using this code.
How to have the knob working with STEPS as : knotRot.js,
see http://www.domitable.com/static/side-projects/jquery-plugins/knobRot/demo.html
Btw, is a really cool plugin.
Thanks to help me.
You can add a minVal and maxVal to the options to limit the range of motion. Also, I thought it would be better to use the snap parameter to make the knob snap to an interval - so snap:90 would make the knob snap to the 4 cardinal directions (N, E, S, W)
http://positlabs.com/files/code/js/SnapKnob/assets/knobKnob/knobKnob.jquery.js
Very Cool! I will definitely use on future projects!
Hey,
Excellent code. :)
I guess i have not used jquery and CSS3 at the same time before, :)
Thanks
Saif
Jo,
I tried the version with maxVal and minVal from
http://positlabs.com/files/code/js/SnapKnob/assets/knobKnob/knobKnob.jquery.js
but there the knob spins around and looses the nice handling. Do you develop a newer version of this plugin?
Thanks, Stevoh
It's beautiful but I couldn't get it to work on Android Chrome which is a shame.