jQuery PointPoint - A Plugin For Pointing To Things
Web designers find themselves in a tough situation - they have to build beautiful user interfaces that are intuitive and usable in the same time. Sometimes, despite our earnest efforts, web applications may become difficult to use for novice users. One solution is to create some sort of a tour of your application's features. The other is to incorporate visual cues in the design itself.
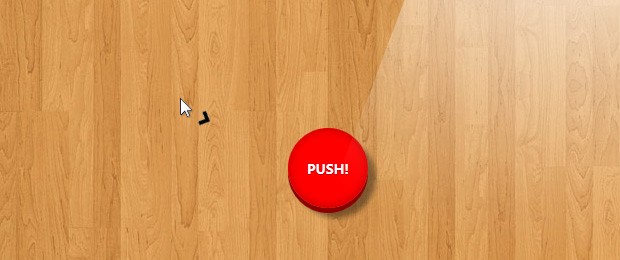
In this tutorial, we will be writing a jQuery plugin that will help you draw users' attention to a specific part of the page, in the form of a small arrow that is displayed next to their mouse cursor. This can be useful for pointing to missed form fields, buttons that need to be pressed, or validation errors that need to be scrolled into view.
How it works
Lets dive straight to the code - it comes at around 100 lines (with comments), so it is not difficult to follow.
jquery.pointpoint.js
(function($){

    // Defining our jQuery plugin

    $.fn.pointPoint = function(prop){

        // Default parameters

        var options = $.extend({
            "class"     : "pointPointArrow",
            "distance"  : 30
        },prop);

        var pointers = [];

        // If CSS transforms are not supported, exit;

        if(!$.support.transform){
            this.destroyPointPoint = function(){};
            return this;
        }

        this.each(function(){

            var findMe = $(this),
                point = $('<div class="'+options['class']+'">').appendTo('body'),
                offset, center = {}, mouse = {}, props = {}, a, b, h, deg, op,
                pointHidden = true, rad_to_deg = 180/Math.PI;

            pointers.push(point);

            // Calculating the position of the pointer on mouse move

            $('html').bind('mousemove.pointPoint',function(e){

                if(pointHidden){
                    point.show();
                    pointHidden = false;
                }

                offset = findMe.offset();

                // The center of the element we are pointing at
                center.x = offset.left + findMe.outerWidth()/2;
                center.y = offset.top + findMe.outerHeight()/2;

                mouse.x = e.pageX;
                mouse.y = e.pageY;

                // We are treating the mouse position and center
                // point as the corners of a right triangle.
                // h is the hypotenuse, or distance between the two.

                a = mouse.y - center.y;
                b = center.x - mouse.x;
                h = Math.sqrt(a*a + b*b);

                // Calculating the degree (in radians),
                // the pointer should be rotated by:
                deg = Math.atan2(a,b);

                // Lowering the opacity of the pointer, depending
                // on the distance from the mouse pointer

                op = 1;
                if(h < 50){
                    op = 0;
                } else if(h < 160){
                    op = (h - 50) / 110;
                }

                // Moving and rotating the pointer

                props.marginTop  = mouse.y-options.distance*Math.sin(deg);
                props.marginLeft = mouse.x+options.distance*Math.cos(deg);
                props.transform  = 'rotate('+(-deg*rad_to_deg)+'deg)';
                props.opacity    = op;

                point.css(props);

            }).bind('mouseleave.pointPoint',function(){
                point.hide();
                pointHidden = true;
            });

        });

        this.destroyPointPoint = function(){

            // Unbind all the event handlers
            // and remove() the pointers

            $('html').unbind('.pointPoint');

            $.each(pointers,function(){
                this.remove();
            });

        };

        return this;
    };

})(jQuery);
When you call pointPoint(), it creates an event listener for the mousemove event. Inside it, the plugin calculates the position and rotation of the arrow using trigonometry functions. Check out this Wikipedia article if you'd like to learn more.
I am also using the transform.js CSS hooks for jQuery, which level the support for CSS3 rotations in browsers that support them (this means the plugin will not work in IE678).
How to use it
To include jQuery PointPoint in your website, you need to copy the jquery.pointpoint folder (located in /assets in the downloadable zip) in your directory structure. After this, all you need to do is include the two js files and the stylesheet, that you find inside, in your page. Refer to index.html as an example.
The plugin itself is simple to use. You just need to call it on the element which you need to point to. The plugin will automatically find the position of the element and update the arrow when you move the mouse. You can also pass an arguments object with two properties - "class" and "distance".
$('#pushButton').pointPoint();

/*
    // You can also pass arguments:
    $('#pushButton').pointPoint({
        "class":"myNewPointer",
        "distance":100
    });
*/
The snippet above adds an arrow next to the mouse cursor, which points to the element with an id of "pushButton". The arguments in the second example will set a custom class on the arrow (in case you want to customize the styling) and move it further away from the mouse cursor. The default styles of the arrow are defined in jquery.pointpoint.css.
When you call the plugin, it returns a jQuery object, so you can use it inside method call chains. There is one one minor difference, however - this object has an additional method - destroyPointPoint(), which you can use to cancel the plugin:
var pp = $('#pushButton').pointPoint();

$('body').click(function(){
    pp.destroyPointPoint();
});
This will remove all arrows and destroy the event listeners for the mouse move event.
We are done!
I hope you find the plugin useful and only use it for good, not evil. As usual, share your suggestions in the comments section.
Bootstrap Studio
The revolutionary web design tool for creating responsive websites and apps.
Learn more
Funny :) Thanks for sharing !
Thank you. Good plugin. Already thought of how to apply it in their development
Funny but very small tut.
Yep small tuts although powerfull thanks !!
I was just playing around for awhile :P well this is the nice tutorial jQuery sample
thanks, i like the idea.
Hi! you made an excellent job! but i dont know could do a friend system, 'cuz it would be amazing! thanks and see you!
Excellent Thank you very much
Oops!! amazing idea..
Would be nice to know if it could be deactivated once the user has actually gone within a certain proximity of the item, that way the effect doesn't become bothersome.
You can use the destroyPointPoint method to remove the arrow. You can combine it with one of the jQuery plugins that tell you once a certain element is scrolled into view.
Fabulous.
I like the look of the button!
And I instantly had an idea where we can use it.
We have an orderform where you have to accept the terms with a checkbox before the sendbutton is enabled. Although we tried to make it clear with some labeling and colors some people had problems with the usability and did not realize why the send-button is disabled.
Now, if we add the plugin and switch it first to the terms-checkbox and then after clicking to the sendbutton i guess this might be pretty helpful!
Thx for sharing.
NICO
Hey! Is it possible with this plugin to rotate an image making it point to the mouse?
Thanks! Excelent tutorial!
Neato! I can't figure out what the button is for, though; just to invite people go closer so that they can see the arrow fade out?
Amazing, though.
I just couldn't live without a red button there. I even thought of playing an HTML5 powered squeak sound once you push it.
Real funny! Thank you for the good work!
Yep this is very funny addons.
"Back fo future" :)
(when lots of webmasters changed text in status bar ect ;])
Funny, I hadn't looked it at this angle. It seems we've gone a complete circle. Now that I think of it, the ShuffleLetters plugin from a few weeks back would do an awesome status bar effect..
This could be used to help sell product or draw attention to areas of your website that you want to make sure users don't miss.
Where did you get the wood background of your demo?
From teh interwebs :)
The idea is really nice and it works quite well.
There is one thing I'd like to point out.
It took 100% of one core of my CPU to work. That's ridiculous, don't you think?
Every mousemove is messing with the CSS. That's something I learned not to do ever long ago, when Firefox was considered a fast browser.
I'd recommend keeping the currently set rotation in a variable and change the CSS only if the value changes.
To make it even better - no human will see under 3 degrees of difference, so you can trigger the CSS change when rotation difference is greater or equal 3
Again, good idea!
is this on github? i think it should be.
Pretty good, it could have several applications for example for a call to action on a landing page. Nice job!
Pretty cool design, i like your demo! thanks for the plugin!
thanks for the plug-in
Great CSS3 usage on the button. Very classy. You still rock bro. Tweeted...
Beautiful, just used it on my website..
Hah that's awesome! I really like new creative and inspiring jQuery plugins! Thanks for the tutorial :)
This was exactly what I needed, thanks a lot!
Though, I have quite a large arrow ( 100 x 45 pixels ). What happened was that the arrows position compared to the mouse was waaaaayyy off,
I've made a few adjustments to correct that:
I added two options (line 9-12 in the example code above)
and at line 47-48 in the example code above
This corrects the arrow position for large arrows.
Very cool.
I noticed that when I went to the right sidebar, the arrow would get to the end of the document and make a bottom scrollbar show up. On your example, if you change
html { overflow-x : hidden }to auto, you'll see what I mean.
So I have the arrow progressively offset as I get to the edge of the screen. I didn't worry about the bottom of the screen. Although it's unlikely, butter to play it safe.
Just before:
point.css(props);
I added:
if(window.innerWidth < (mouse.x +30)){ var windowOffsetX = (30-(window.innerWidth - mouse.x))/2; props.marginLeft = props.marginLeft - windowOffsetX; }Hello,
Amazing plugin.
It is possible to have a fixed image pointing to a menu?
Thanks,
Joel Rocha