An Awesome CSS3 Lightbox Gallery With jQuery
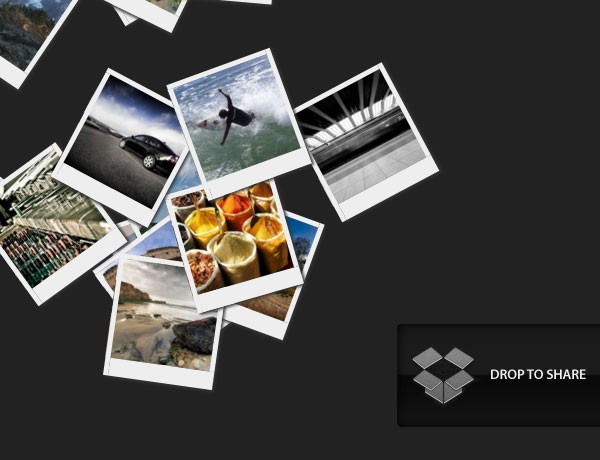
In this tutorial we are going to create an awesome image gallery which leverages the latest CSS3 and jQuery techniques. The script will be able to scan a folder of images on your web server and build a complete drag and drop lighbox gallery around it.
It will be search-engine friendly and even be compatible with browsers which date back as far as IE6 (although some of the awesomeness is lost).
We are using jQuery, jQuery UI (for the drag and drop) and the fancybox jQuery plugin for the lightbox display in addition to PHP and CSS for interactivity and styling.
Before reading on, I would suggest that you download the example files and have the demo opened in a tab for reference.
Note: you can find a more modern lightbox gallery made with the Bootstrap framework over at Epic Bootstrap.
So lets start with step one.
Step 1 - XHTML
The main idea is to have PHP as a back-end which will generate the necessary XHTML for each image. The generated code is later included in demo.php and completes the gallery XHTML front-end.
demo.php
<!-- The gallery container: -->
<div id="gallery">

<?php
/* PHP code, covered in detail in step 3 */
?>

<!-- The droppable share box -->
<div class="drop-box">
</div>

</div>

<div class="clear"></div>

<!-- This is later converted to the modal window with the url of the image: -->
<div id="modal" title="Share this picture">
<form>
<fieldset>
<label for="name">URL of the image</label>
<input type="text" name="url" id="url" class="text ui-widget-content ui-corner-all" onfocus="this.select()" />
</fieldset>
</form>

</div>
Nothing too fancy here. Notice the modal div - it is used to generate the modal window that is shown when the user drops a picture on the share box. But more on this later on.
Step 2 - CSS
Now that we have all the markup in place, it is time to style it. First we need to include the CSS files in the head section of the page.
demo.php
<link rel="stylesheet" type="text/css" href="demo.css" />
<link rel="stylesheet" href="http://ajax.googleapis.com/ajax/libs/jqueryui/1.7.2/themes/ui-darkness/jquery-ui.css" type="text/css" media="all" />
<link rel="stylesheet" type="text/css" href="fancybox/jquery.fancybox-1.2.6.css">
After we've done that, we can start writing the styles.
demo.css
body{
    /* Styling the body */
    color:white;
    font-size:13px;
    background: #222222;
    font-family:Arial, Helvetica, sans-serif;
}

#gallery{
    /* The pics container */
    width:100%;
    height:580px;
    position:relative;
}

.pic, .pic a{
    /* Each picture and the hyperlink inside it */
    width:100px;
    height:100px;
    overflow:hidden;
}

.pic{
    /* Styles specific to the pic class */
    position:absolute;
    border:5px solid #EEEEEE;
    border-bottom:18px solid #eeeeee;

    /* CSS3 Box Shadow */
    -moz-box-shadow:2px 2px 3px #333333;
    -webkit-box-shadow:2px 2px 3px #333333;
    box-shadow:2px 2px 3px #333333;
}

.pic a{
    /* Specific styles for the hyperlinks */
    text-indent:-999px;
    display:block;
    /* Setting display to block enables advanced styling for links */
}

.drop-box{
    /* The share box */
    width:240px;
    height:130px;
    position:absolute;
    bottom:0;
    right:0;
    z-index:-1;

    background:url(img/drop_box.png) no-repeat;
}

.drop-box.active{
    /* The active style is in effect when there is a pic hovering above the box */
    background-position:bottom left;
}

label, input{
    /* The modal dialog URL field */
    display:block;
    padding:3px;
}

label{
    font-size:10px;
}

fieldset{
    border:0;
    margin-top:10px;
}

#url{
    /* The URL field */
    width:240px;
}
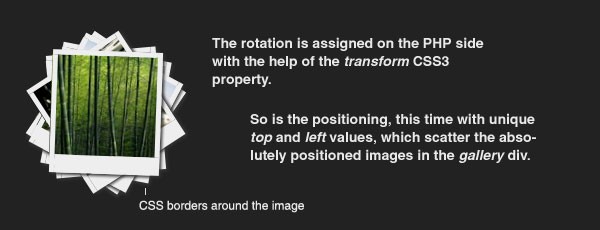
One of the classes above, probably needing additional clarification is the pic CSS class. This is used to style the images to look like polaroids. To achieve this, it basically puts a white border around each image.
Also used in the class is the box-shadow CSS3 property, which casts a shadow under each polaroid.
If you've looked around the demo of the gallery, you've noticed that the images are scattered on the page and rotated in a random fashion. This is done solely with CSS in the PHP side, as you will see in a moment.
The rest of the styles are pretty straightforward and won't be covered in detail here.
Step 3 - PHP
As you remember, in step 1 we covered the XHTML part and mentioned that PHP is responsible for generating the markup that comprises the individual images. And here is how this is actually done:
demo.php
/* Configuration Start */
$thumb_directory = 'img/thumbs';
$orig_directory = 'img/original';
$stage_width=600;
$stage_height=400;
/* Configuration end */

$allowed_types=array('jpg','jpeg','gif','png');
$file_parts=array();
$ext='';
$title='';
$i=0;

/* Opening the thumbnail directory and looping through all the thumbs: */
$dir_handle = @opendir($thumb_directory) or die("There is an error with your image directory!");
$i=1;

while ($file = readdir($dir_handle))
{
    /* Skipping the system files: */
    if($file=='.' || $file == '..') continue;

    $file_parts = explode('.',$file);
    $ext = strtolower(array_pop($file_parts));

    /* Using the file name (withouth the extension) as a image title: */
    $title = implode('.',$file_parts);
    $title = htmlspecialchars($title);

    /* If the file extension is allowed: */
    if(in_array($ext,$allowed_types))
    {
        /* Generating random values for the position and rotation: */
        $left=rand(0,$stage_width);
        $top=rand(0,400);
        $rot = rand(-40,40);

        if($top>$stage_height-130 && $left > $stage_width-230)
        {
            /* Prevent the images from hiding the drop box */
            $top-=120+130;
            $left-=230;
        }

        /* Outputting each image: */
        echo '
        <div id="pic-'.($i++).'" class="pic" style="top:'.$top.'px;left:'.$left.'px;background:url('.$thumb_directory.'/'.$file.') no-repeat 50% 50%; -moz-transform:rotate('.$rot.'deg); -webkit-transform:rotate('.$rot.'deg);">

        <a class="fancybox" rel="fncbx" href="'.$orig_directory.'/'.$file.'" target="_blank">'.$title.'</a>

        </div>';
    }
}

/* Closing the directory */
closedir($dir_handle);
First, we open the thumbnail directory with opendir (using the @ modifier to prevent any possible errors from getting shown to the user) and looping through all the images.
In the loop, we skip the non-image files and generate some XHTML code for each image, which is directly printed to the screen.
As mentioned in the CSS part, PHP handles the rotation and scattering of the images on the page. Each image is positioned at random X and Y coordinates, and rotated in an angle between -40 and 40 degrees (to prevent upside-down images). Those are generated with the use of the rand() PHP function and included as CSS styles in the picture's style attribute.
There are two image folders used by the gallery - thumbs, which holds the 100x100 px thumbnails, and original, which holds the big versions of the images. It is important that the thumbnail and original image have the same name, otherwise the gallery won't function properly.
The only thing left is to throw in some interactivity.
Step 4 - jQuery
We now have a good looking CSS gallery on our hands. But that means nothing if we cant drag the pretty pictures around the screen and zoom them in a fancy lightbox display, does it?
This is where jQuery comes into play.
script.js
$(document).ready(function(){
    // Executed once all the page elements are loaded
    var preventClick=false;
    $(".pic a").bind("click",function(e){

        /* This function stops the drag from firing a click event and showing the lightbox */
        if(preventClick)
        {
            e.stopImmediatePropagation();
            e.preventDefault();
        }
    });

    $(".pic").draggable({

        /* Converting the images into draggable objects */
        containment: 'parent',
        start: function(e,ui){
            /* This will stop clicks from occuring while dragging */
            preventClick=true;
        },
        stop: function(e, ui) {
            /* Wait for 250 milliseconds before re-enabling the clicks */
            setTimeout(function(){ preventClick=false; }, 250);
        }
    });

    $('.pic').mousedown(function(e){
        /* Executed on image click */
        var maxZ = 0;

        /* Find the max z-index property: */
        $('.pic').each(function(){
            var thisZ = parseInt($(this).css('zIndex'))
            if(thisZ>maxZ) maxZ=thisZ;
        });

        /* Clicks can occur in the picture container (with class pic) and in the link inside it */
        if($(e.target).hasClass("pic"))
        {
            /* Show the clicked image on top of all the others: */
            $(e.target).css({zIndex:maxZ+1});
        }
        else $(e.target).closest('.pic').css({zIndex:maxZ+1});
    });

    /* Converting all the links to a fancybox gallery */
    $("a.fancybox").fancybox({
        zoomSpeedIn: 300,
        zoomSpeedOut: 300,
        overlayShow:false
    });

    /* Converting the share box into a droppable: */
    $('.drop-box').droppable({
        hoverClass: 'active',
        drop:function(event,ui){

            /* Fill the URL text field with the URL of the image. */
            /* The id of the image is appended as a hash #pic-123 */
            $('#url').val(location.href.replace(location.hash,'')+'#' + ui.draggable.attr('id'));
            $('#modal').dialog('open');
        }
    });

    /* Converts the div with id="modal" into a modal window  */
    $("#modal").dialog({
        bgiframe: true,
        modal: true,
        autoOpen:false,

        buttons: {
            Ok: function() {
                $(this).dialog('close');
            }
        }
    });

    if(location.hash.indexOf('#pic-')!=-1)
    {
        /* Checks whether a hash is present in the URL */
        /* and shows the respective image */
        $(location.hash+' a.fancybox').click();
    }
});
First we are binding a click function to the images, which prevents the lightbox from showing once we start dragging the pic around.
After this we make all the pictures draggable, and then we set up the lightbox.
Later we turn the "Drop to share" box into a droppable, which enables it to detect when a picture is hovered and dropped. This allows us to add a special hover style to the container, and to open the modal window on drop.
The modal window itself is a user interface component that comes with jQuery UI. It hides all the page elements under a semi-transparent overlay, and thus blocking them for the user. The only thing occupying the their attention is the message window, which in our case holds the text box with the URL of the image, as defined in the div with id of modal in step one.
Last, we have a few lines of code which check whether a hash of the type #pic-123 is present in the URL, which would cause the respective image to be shown in the lightbox on page load.
With this our awesome CSS3 gallery is complete!
Conclusion
Today we created a fancy gallery, which uses a wide set of web technologies to bring you a new kind of dynamic experience.
In addition, it is extremely easy to add to an existing site - you just need upload it and provide a folder with images, no databases required.
You are free to modify and use this gallery in your own sites. Be sure to share all your awesome creations based on this gallery with the community via our Tutorial Mash-ups (above the comment section).
Also, if you enjoyed this article, you might want to subscribe to our RSS feed or follow us on twitter.
Bootstrap Studio
The revolutionary web design tool for creating responsive websites and apps.
Learn more
This reminds me a lot about my polaroid photo viewer, except this one has the "click to zoom" effect implemented (something I didn't do). My version also rotates the polaroids once you've dropped them :) .
Well done and thanks for sharing!
A great, great, great, great, great tutorial ! As usual...
I'm just wondering how is going to be when you'll come out with a "medium" quality article because we get used to premium quality here...
Thanks !
A great photo viewer, Marco! Now that I look at it they do look similar.
Thanks for sharing the link, I am sure that the readers would love to see your implementation.
Thanks for the comment, Jµ, I appreciate it!
Again Martin, BRAVO.
Serendipity too, as I 'just-now' got off the phone with a client that forever has champagne ideas with but a beer budget (ironically coincidental, he's a sports-bar general manager)
He wanted ability to upload photos from 'events' they have, with photos showing on his site. With a little tweaking, marrying the style of the existing site with elements of the tutorial, this should fit the bill. (no pun, please)
So, again, thanks again for a well-written and timely tutorial.
Great tutorial! But it would look even better if the image rotated when you grabbed it, using the jquery rotate plugin.
This sort of thing is great. It'll increase it's "awesomeness" once more people have multi-touch screens and can move the photos around with their hands. Nice work Tutorialzine.
So much better to do it it a normal browser than forking out $10k or more for a Surface table.
Very nice. Great tutorial too. Thanks for sharing.
You could use the drag and drop api rather than using jquery ui to emulate drag and drop.
Great Tut, thanks for sharing this.
I only don't quit understand the SHARING part. What is the use/goal of this?
Could you please explain?
Again thanks!
@ Ben
The sharing drop-box gives you a unique URL to the picture, which, when opened, shows the pic in the lighbox view on page load.
You can build upon this functionality, by providing a way for users to share the image on twitter, facebook and other social media.
OK, Martin.
It's clear now, thanks.
You've done a great job, Martin - there is no doubt. I am waiting eagerly for your next tutorial ;)
Good luck
holly cheat! very hard work!
Thank to $god it's free so there is no charge for awesomeness nor for attractiveness ;-)
I don't know why, but if I copy the 'share' URL, paste into the address line and press enter, nothing happens (I think it should reload the page and zoom the selected image). When I surf to an other webpage and paste the URL again, it works well. I have FF 3.5.5.
Wow, this is really a great gallery and the first time I see PHP with jquery etc. :-)
That's the great tutorial,
I'm currently implementing this for my project, and when I'm opening it with IE8, all the thumbnails are displayed in same way, these are not randomly rotated..
Is it just for me or its something with IE?
Great job. Love the look and feel of it. Also, thanks for sharing. This question is probably out of my limited design range, but any tips on how to implement this on the Thesis theme for wordpress? Or just a category page (ex: /category/photography)? Many thanks!
@ hellsing
This happens because the URL is checked only on page load. And because the share URL differs to the default gallery one only by a hash parameter (adding hash parameters to the url does not reload the page), the change becomes unnoticed.
However if you paste the share URL in the address bar, but haven't yet opened the gallery, the hash is detected and the pic is zoomed on page load.
This can be fixed (if required) by setting the if statement on lines 79 - 84 of script.js as a interval with setInterval. This will check the URL every second (or few seconds).
@ Domas
The gallery uses a number of CSS rules that are yet not supported by IE. However you still have a fully functional gallery (only the images are not rotated, and there are no drop-shadows).
it's a fantastic css3 gallery but it doesn't work with i.e. the rotation isn't supported by i.e. and the pictures are displayed horizzontally :((((
Hey, Nice post, I rather like the Gallery.
Amazingly well explained and exposed... loved it... Thanks!
Awesome job. Hats off that you share this work with everyone....
Thanks for a great tutorial!
I have one problem though. The images doesn't come up rotated - even the demo you have on this page doesn't show any rotated images.
Can it be smth wrong with my browser? Have tested in both Firefox and IE
sorry, problem solved.
had FF 3.0.x before and just updated to the latest version.
works like a charm! thanks!
Great job !!
But, can i ask you if is possible to add a little text and/or link under the open photos?
Hi !
Thank you for all your great tutorials !
Just one question : is it possible to use this gallery with your "Simple AJAX website" ?
The gallery alone works fine. But when I'm trying to use it with the Simple ajax website, I have the msg : There is an error with your image directory!
I've check the adress, and it is correct.
Do you have an issue ?
Ok, done.
There was the opendir function...
Thx again for the tuto.
Excellent gallery!
Im currently testing this on a page here (http://www.superior-testing.co.uk/design_photography.php) but having a small issue. Im getting the image file name displaying over the image?
Any ideas how I could fix this? Im guessing it maybe clashing with something CSS or Javascript somewhere else on the page?
great tut! love that it 'works' in FF... I have been looking for a polaroid lightbox that does. once they implement support for this it will be even better. looks great in safari though, and that's my main concern! thank you very much!!!
quick question:
is there an easy way to display only images within particular album?
when I upload images into my albums, I store such data as image id, album id, username who uploaded (with the help of sessions), file name which is stored... basically what I could do is just run SQL query and select only particular images and just output them, but how?
any thoughts or suggestions are appreciated :)
Can I load everything inside my html page instead of loading up .php page? If so how?
Hey Guys! check this out.
I have been doing jquery for about one week. I'm wandering around cyberhelp looking for a cool "button" and I found this! Gotta have it, I'm thinking 'cause the "button" is supposed to connect to TWO SLIDESHOWS! each with 300 plus images. Wow, just how lucky can you get these days?
Anyway, I have three questions:
Can/How do you add a hover caption to the fullsize picture?
Can/How do you scatter the pictures around the outside of the screen in a working layer so I can put something else in the middle?
I don't need all the code, unless its already been done, just the architecture.
And where do I send the twelve pack?
While I am waiting for your answer, I gonna go learn something about php !!!
bill.onthebeach
Hey Guys!
This just keeps getting better!
Forget question #1.
I was showing my twelve year old your demo. Wanted to know what the kids might think. SHE JUST SHOWED ME how to pile all the pictures up on one side of the page and then wouldn't give me my mouse back!
Lemme know about those captions and where to send that two twelve packs.
bill.onthebeach
Thanks
Nice work
keep it up...
when i click on an image, and then click through the images via "next", the slideshow comes to an end at the last image and closes. If i happen to click on an image fairly close to the end of the entire album, and click through via the right arrow, some photos won't be seen this way.
Is there a way that after clicking 'next' on the last photo in the album, it will loop back to the first image instead of closing?
Thanks, great gallery!
Fantastic idea - just one little query, do you know before I dig around to link this to a database that has the photos in it and that users could search for words and then the results would show up in the scatter images?. It would be nice to just have say a search box below a selection of images and let people put in a search term.
Thanks
richardh
How easy would this be to integrate with Flickr rather than having the images hosted on the server?
Also, I'm noticing a significant lag when dragging images on top of a background image as opposed to the demo where there is no image. Any remedies for this?
One problem with this fantastic image gallery is its inability to generate thumbnails when I dragged the pictures into the original folder. Am I right? Hence, I would need to resize the original pictures into 100px by 100px as thumbnails.
Any idea to improve it so thumbnails will be generated automatically.
Regards,
weilik
Amazing tut!!
How do I contain the images in a certain area of the page? I tried altering the width of the gallery, and placing the gallery in another container. Also tried adjusting the stage with and height. If I click on an image to drag it it then automatically moves to the within the boundaries, but it doesn't generate there when I first load the images.
this is very useful
Hey , fantastic work! From a designeres point of view, clean simple and interesting!
I'm thinking of using this approach for an online store therefore, would it be possible to pull the images from a mysql and display with some descriptive text and variables?
What do you think?
That's impressive. I remember reading a similar article on Carsonifies about the same idea.
Images were not rotated in Opera.
In .php file just add after "-o-transform:rotate('.$rot.'deg);" to make it work.
Does anyone know how to make it work in IE?
To support the Internet Explorer Browser 7.0, we have to use the following method:
filter: progid:DXImageTransform.Microsoft.Matrix()
To make things working, add the following php-code, to calculate the cos and sin:
$deg2radians = pi() 2 / 360;
$rad = $rot $deg2radians;
$cosTheta = cos($rad);
$sinTheta = sin($rad);
Then we can use it in the style property:
filter: progid:DXImageTransform.Microsoft.Matrix(sizingMethod=\'auto expand\', M11='.$cosTheta.',M12='.-$sinTheta.',M21='.$sinTheta.',M22='.$cosTheta.');
Full code:
Hope, thats helps.
Mr.Alex Thanks a lot!
It is works in all IE browsers
it was simply awesome
it helps me a lot..
ok i fixed problem :D
ok i fixed problem :D
Hello anyone know how i can put a background onto this, i have a wood one and have tried everything to put it on. Please help fast
hi, thanks for this tutorial, but doesn't work in IE9 .
it's really weird that the example works on older browsers and not IE9
Hi, I've been reading this article and the code, I think it's amazing. I have a question, cause I would like to upgrade the fancybox in this code to a newer fancybox. any idea??
thank you
This is an awesome tutorial. Just wondering if anyone has figured out how to rotate back to the first image instead of just ending on the last one.
Thanks!
Hey, is it possible to alter this to have a comment with the image when it pops up? And that comment me a hyper link? I want to use this in a manner where each image is a featured image from a Blog post. you click it and the image shows up in the light box with a clickable caption. anyone able to lend a hand there?
Trying to use this with a wordpress static page. Im running into some trouble with the following...
in the configuration start portion it specifies the photo directories.
/ Configuration Start /
$thumb_directory = 'img/thumbs';
$orig_directory = 'img/original';
however, when these load i can not see the pictures. just the frames. upon further investigation it appears that i can not properly set the directories to work with the static page as the URL for the page is http://www.sagebrushamstaffs.com/in-memory/ . The last portion of the URL is not a directory but the page itself. when the directories are declared the full path to an image would be something like this... http://www.sagebrushamstaffs.com/in-memory/img/original/industrial-mech.jpg. It is thinking that /in-memory/ is a directory when it is not. any way to go up a level when declaring the directories? i have tried ../img/thumbs but the script bombs saying there is a problem with my image directories.
any assistance would be greatly appreciated.
Lovely... However, it doesn't work in IE9 (at least not on my machine). Might be good to mention that somewhere, since the average web developer uses Firefox or Safari, and I've run into quite a few sites that apparently they never bothered to test in what's still used by the majority of "non-developer" people.
Awesome! Thank you for sharing this. Any idea if this can easily be turned into Wordpress compatible, or if there is a similar WP plug-in already available (even if it's not free) ?
do i have to resize the images in photoshop and place them in the thumb and folder? or does the original folder do that automatically? thanks
When I try this in IE 8 it doesn't enlarge the images - they are all upright and the hyper-links to the main pictures don't open - any ideas?? Thanks for a great effect though!!!
Further to my last - it works ok on my 64bit version of IE8 but on the 32 bit version - odd!!!!
Great gallery!
As the drag and drop feature does not work in IE9 or on the iPad, is there any way to stop the images from overlapping so that the script produces a simple scattered gallery and lightbox without the need for drag and drop feature?
Thanks!
First of all it is a great tutorial. Thanks for sharing.
I figured out that rotation is not working with IE10 (maybe 9 also) and may not work on opera either.
adding:
transform:rotate(" + rot + "deg); -ms-transform:rotate(" + rot + "deg); -moz-transform:rotate(" + rot + "deg); -webkit-transform:rotate(" + rot + "deg); -o-transform:rotate(" + rot + "deg);
to php code will fix the rotation. (http://www.w3schools.com/cssref/css3_pr_transform.asp)
But there is one more thing. Pictures are not draggable in IE10 also but i don't know how to solve it yet.
And as an update. Anyone can use this code for ASP files instead of php part (dropbox is not inculded yet).
<%
/ Configuration Start /
string thumb_directory = "/images/illustrator/thumbs";
string orig_directory = "/images/illustrator/original";
int stage_width = 600;
int stage_height = 400;
int i = 1;
/ Configuration end /
It is not responding to touch events, is there any easy way to make it respond to touch events.
Very decent tutorial. Thanks for that.
Would like to enquire if anyone has been able to integrate this functionality with Wordpress and got it to work?
Thanks,
Charl
How I can sort my previews? Is it an option in JS config?
very nice tuturial, thanks
I have a question: is it possible to use this random gallery with images and videos from vimeo or youtube?
Hi there!
GREAT JOB! and thanks for publishing.
I was playing a little bit with this and I was wondering how can I set up a certain order of the pictures when the page is loaded. The code you provide goes with a random positioning of the images, right??
Thanks
Jaume
I was wondering 2 things.
1- how can we make this gallery ready for touch devices as phones or tablets?
2- how can we make the pictures have space in the name so it's better for SEO?
the rest, it's a fu***ing awesome gallery!
Did anybody got this working with Drupal ?
Is it possible to implement this with the flickr api? pull photos from flickr instead of the server?