Dropbox File Uploader With Twitter Bootstrap
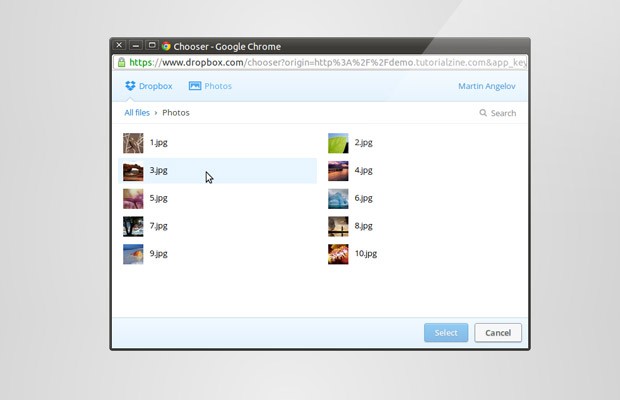
A few weeks ago, Dropbox introduced a neat new feature - the Dropbox Chooser. By embedding it into your website, you give users a button with which they can attach files from their online storage.
Today we are going to use this feature to create a simple application that allows people to attach a photo from their Dropbox account, crop an area with the Jcrop plugin, and download the result. Additionally, we will make use of Twitter Bootstrap to show dialog windows, and PHP on the backend for the actual photo cropping.
The HTML
To start, here is the HTML document we will be working with. In the head, I am including the stylesheets for bootstrap, the Jcrop plugin and our custom CSS file. In the footer, we have the Dropbox JavaScript library, jQuery, Bootstrap, Jcrop and script.js, which we will be writing in the next section.
index.html
<!DOCTYPE html>
<html>
    <head>
        <meta charset="utf-8" />
        <title>Dropbox File Uploader With Twitter Bootstrap | Tutorialzine </title>

        <!-- The stylesheets -->
        <link rel="stylesheet" href="assets/css/bootstrap.min.css"  />
        <link rel="stylesheet" href="assets/Jcrop/jquery.Jcrop.min.css" />
        <link rel="stylesheet" href="assets/css/styles.css"  />
    </head>
    <body>

        <div id="main">

            <input type="dropbox-chooser" name="selected-file" id="db-chooser"
                        data-link-type="direct" class="hide" />
            <div id="content"></div>
            <button class="btn btn-inverse hide" type="button"
                        id="cropButton">Crop Image</button>

            <!-- Bootstrap Modal Dialogs -->

            <div id="cropModal" class="modal hide fade" role="dialog"
                        aria-hidden="true">
                <div class="modal-header">
                    <button type="button" class="close" data-dismiss="modal"
                        aria-hidden="true">×</button>
                    <h4>Your cropped image</h4>
                </div>
                <div class="modal-body center"></div>
                <div class="modal-footer">
                    <button class="btn" data-dismiss="modal" aria-hidden="true">Close</button>
                </div>
            </div>

            <div id="errorModal" class="modal hide fade" role="dialog" aria-hidden="true">
                <div class="modal-header">
                    <h4></h4>
                </div>
                <div class="modal-footer">
                    <button class="btn btn-danger" data-dismiss="modal"
                        aria-hidden="true">OK</button>
                </div>
            </div>

            <div id="progressModal" class="modal hide fade" role="dialog" aria-hidden="true">
                <div class="progress progress-striped active">
                    <div class="bar" style="width: 100%;"></div>
                </div>
            </div>

        </div>

        <!-- JavaScript Includes -->
        <script src="https://www.dropbox.com/static/api/1/dropbox.js"
            id="dropboxjs" data-app-key="z4ylr6z1qlivll4"></script>
        <script src="http://code.jquery.com/jquery-1.8.3.min.js"></script>
        <script src="assets/js/bootstrap.min.js"></script>
        <script src="assets/Jcrop/jquery.Jcrop.min.js"></script>
        <script src="assets/js/script.js"></script>

    </body>
</html>
In the body of the document, we also have the markup which Twitter Bootstrap will use to display the modal dialogs. We have three modals with unique IDs: #cropModal, #errorModal and #progressModal. They are displayed with simple jQuery function calls (more on that in a moment).
Familiarize yourself with the markup as it is standard for Bootstrap. Modals may have optional headers, bodies and footers, which are styled appropriately. You can put whatever HTML you want in them. By specifying classes, you can alter the behavior of the dialogs. The aria-hidden attributes are there to hide the content from screenreaders. Buttons have the data-dismiss="modal" attribute, which tells bootstrap that it should bind an event listener on them and close the modal window when they are clicked.
Note: We are only using the modal functionality of Bootstrap here, but the framework has much more to offer. Read about the modal dialogs here, or look around their site for more.
The jQuery
jQuery's job is to listen for events on the Dropbox button, initialize Jcrop with the selected image, and send an AJAX request to crop.php. Here is a high-level overview of what the code would be like:
assets/js/script.js
$(document).ready(function() {

    var cropButton      = $('#cropButton'),
        dbChooser       = $("#db-chooser"),
        errorModal      = $('#errorModal'),
        errorMessage    = errorModal.find('h4'),
        progressBar     = $('#progressModal'),
        cropModal       = $('#cropModal'),
        content         = $('#content');

    var coordinates, src,
        name, type,
        imgWidth, imgHeight,
        newWidth, newHeight,
        ratio, jcrop;

    dbChooser.on("DbxChooserSuccess", function(e) {

        // Here we will listen when a file is
        // chosen from dropbox, insert it into the page
        // and initialize the Jcrop plugin

    });

    function showCropButton(c) {
        // This function will called when we want to show
        // the crop button. This is executed when we have
        // made a selection with Jcrop.
    }

    function showError(err){
        // This function will display an error dialog
    }

    cropButton.click(function() {

        // This will send an AJAX requst to crop.php
        // with the dimensions of the crop area and
        // the URL of the image.

    });
});
The first step is to create a key for your Dropbox Chooser. I have to say that this is the easiest and best thought-out developer page I have seen - generating application keys is embedded directly there and is straightforward to use. Just hit the "Create new app" link in the settings section and fill in your details (the domains field should contain the domains that you will be using the button on; for development purposes you might want to also include localhost). This will give you a key and embed code that you can use on your page - replace it with mine in index.html.
Now that we have a functioning button, we have to set up an event listening function for the success event. The event object will contain the image url from Dropbox, along with attributes like file size, name and thumbnails:
dbChooser.on("DbxChooserSuccess", function(e) {
    // Assigning the original event object, so we have access
    //to the files property passed by Dropbox:
    e = e.originalEvent;

    name = e.files[0].name;
    src = e.files[0].link;

    type = name.split('.');
    type = type[1] || '';

    if (type.toLowerCase() != 'jpg') {
        showError('This file type is not supported! Choose a jpg.');
        return false;
    }

    if (e.files[0].bytes > 1024*1024) {
        showError('Please choose an image smaller than 1MB!');
        return false;
    }

    // If we have previously initialized jCrop:

    if(jcrop){
        jcrop.destroy();
        cropButton.hide();
    }

    progressBar.modal('show');

    var img = $('<img>');

    img.load(function() {

        imgWidth = img.width();
        imgHeight = img.height();

        if (imgWidth >= 575 || imgHeight >= 575) {

            // The image is too large, resize it to fit a 575x575 square!

            if (imgWidth > imgHeight) {  // Wide

                ratio = imgWidth / 575;
                newWidth = 575;
                newHeight = imgHeight / ratio;

            } else {    // Tall or square

                ratio = imgHeight / 575;
                newHeight = 575;
                newWidth = imgWidth / ratio;

            }

        } else {

            ratio = 1;
            newHeight = imgHeight;
            newWidth = imgWidth;

        }

        // Remove the old styles
        img.removeAttr('style');

        // Set the new width and height
        img.width(newWidth).height(newHeight);

        // Initialize jCrop
        img.Jcrop({
            onChange : showCropButton,
            onSelect : showCropButton
        }, function(){
            // Save the jCrop instance locally
            jcrop = this;
        });

        // Hide the progress bar
        progressBar.modal('hide');
    });

    // Show the image off screen, so we can
    // calculate the width and height properly
    img.css({
        'position' : 'absolute',
        'top' : -100000,
        'left' : -100000,
        'visibility' : 'hidden',
        'display' : 'block'
    });

    // Set the SRC attribute and trigger the load
    // function when the image is downloaded

    content.html(img.attr('src', src));

});
When the user makes a selection with Jcrop, the showCropButton callback is called with an object containing coordinates, width and height (see the docs for more examples). Inside that function, we show or hide the #cropButton element depending on the size of the selected area.
function showCropButton(c) {
    if (c.w == 0 || c.h == 0) {
        cropButton.hide();
    } else {
        cropButton.show();
        coordinates = c;
    }
}
Lastly we only have to write the functions for showing errors, and sending an AJAX request.
function showError(err){
    errorMessage.text(err);
    errorModal.modal('show');
}

cropButton.click(function() {

    coordinates.x = Math.round(coordinates.x * ratio);
    coordinates.y = Math.round(coordinates.y * ratio);
    coordinates.w = Math.round(coordinates.w * ratio);
    coordinates.h = Math.round(coordinates.h * ratio);

    progressBar.modal('show');

    $.post('crop.php', {

        'coordinates' : coordinates,
        'src' : src

    }, function(r) {

        // Notice the "one" method - this
        // executes the callback only once

        progressBar.modal('hide').one('hidden', function() {

            cropModal.find('.modal-body').html('<img src="' + r + '" >');

            setTimeout(function() {
                cropModal.modal('show');
            }, 500);

        });

    });
});
Great! We now have a working example. All we have to do now is actually crop the image. For this, we will be writing a short PHP script.

The PHP
This script will receive a POST AJAX request, with the URL of the original Dropbox image and the coordinates of the cropped area. It will then use the GD Library functions to resize it and write it to disk. Before exiting, it will echo the temporary name to the crop, which will be displayed by jQuery.
crop.php
$filename_length = 10;
$dir = 'tmp/'; // where to store the cropped images

if ($_SERVER['REQUEST_METHOD'] == 'POST' && isset($_POST['src'])) {

    $src = $_POST['src'];
    $coordinates = $_POST['coordinates'];

    $url = parse_url($src);
    $info = get_headers($src, 1);

    // Only allow photos from dropbox
    if ($url['host'] == 'dl.dropbox.com') {

        if ($info['Content-Type'] == 'image/jpeg' && $info['Content-Length'] < 1024*1024) {

            // Cache the remote file locally
            $cache = $dir . md5($src);

            if(!file_exists($cache)){
                file_put_contents($cache, file_get_contents($src));
            }

            // Original image
            $img = imagecreatefromjpeg($cache);

            // New image with the width and height of the crop
            $dst = imagecreatetruecolor($coordinates['w'], $coordinates['h']);

            // Copy and resize it depending on the crop area
            imagecopyresampled($dst, $img, 0, 0, $coordinates['x'], $coordinates['y'],
                $coordinates['w'], $coordinates['h'], $coordinates['w'], $coordinates['h']);

            // Generate a temporary name and write the file to disk
            $name = substr(str_shuffle("0123456789abcdefghijklmnopqrstuvwxyz".
                        "ABCDEFGHIJKLMNOPQRSTUVWXYZ"), 0, $filename_length);
            imagejpeg($dst, $dir . $name . '.jpg');

            // Print it for jQuery
            echo $dir . $name . '.jpg';

        } else {
            echo 1;
        }
    } else {
        echo 2;
    }

}
With this our Dropbox Photo Upload and Crop example is complete!
Done!
This tutorial is an example of a lot of technologies working together. We used the Dropbox Chooser, Twitter Bootstrap, Jcrop, jQuery, AJAX and PHP with the GD functions to create this image crop demo and I hope that it will be useful to you.
Bootstrap Studio
The revolutionary web design tool for creating responsive websites and apps.
Learn more
Awesome, awesome work. been meaning to start toying around with the Dropbox API. This is an excellent starting point. Thanks for the hard work and great share!
Wonderful tutorial!
very nice! thank you
Great!
it's cool!!
Hi Martin,
This tut will keep me busy for a few weeks... It looks very promising.
One point, perhaps a bug in your code:
When playing the demo and choosing a well formed .jpg image in my Dropbox, the system gives an error message that I should choose a .jpg image.
(The photo's on my Dropbox are rather big. Maybe that cause it?)
The script is explicitly checking for the ".jpg" extension, so it would fail if your images are called ".jpeg". It is a bit of negligence on my part, but you can easily fix it once you download it.
This is odd...
All the pics on my Dropbox have the .jpg extension. Am I the only one confronted with this problem? Perhaps one can only download images from a 'public' map?
I found the problem: the .jpg extension MUST be all lower case.
Thank you for catching that! I added a call to the toLowerCase() method on the type string. It should work correctly now.
Great tutorial! One thing this does need is the ability to upload your cropped image to dropbox
Awesome article!
Great article! Thanks for all the tutorials! :)
It's possible get only the icon of Dropbox?
Great tutorial! But why is the title "Dropbox File Uploader With Twitter Bootstrap"? Unless I missed it, where is the "File Uploader" part of the this Tut? Kinda misleading...
Doesn't work with IE10. Doing a 'select' on a chosen Dropbox image does nothing.
Nice work, though I would generate my temporary filename with
$name = md5(microtime());
as it's less likely to produce duplicate filenames than your method (also less to type!)
First of all, a great app! The demo works fine.
Unfortunately it doesnt work for me local. Uploading form dropbox works. I see that the image has been uploaded succesfully, when I push the crop button also the pop up appears, but without a image. I only see the icon that he recognized the .jpg file but without the image himself. Plz help me!