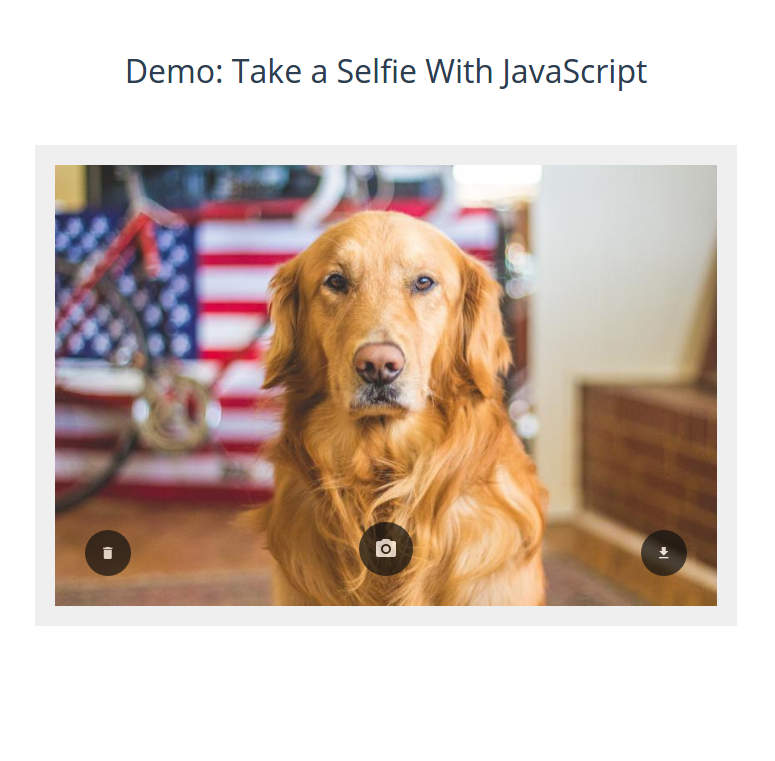
Take a Selfie With JavaScript
In this tutorial we are going to show you how to make a JavaScript photobooth app that takes images using the camera on your phone, laptop or desktop. We will showcase a number of awesome native APIs that allowed us to make our project without any external dependencies, third-party libraries or Flash - vanilla JavaScript only!
Note that this app uses experimental technologies that are not available in desktop and mobile Safari.
The App
To the end user our app is just an oversimplified version of the camera app you can find on any smartphone. It uses a hardware camera to take pictures - that's it. Under the hood, however, a whole lot of JavaScript magic is going on. Here is a high-level overview:
- We access the camera input and get a video stream from it using the getUserMedia API.
- Project the camera stream onto a HTML video element.
- When the user wants to take a picture, we copy the current video frame and draw it on a canvas element.
- Transform the canvas into an image dataURL which then can be shown on the screen or downloaded as a PNG.
In the article below we will only look at the more interesting parts of the code. For the full source go to the Download button near the top of this page or checkout the demo on JSfiddle.
Keep in mind that the navigator.getUserMedia API is considered deprecated, but it still has pretty good browser support and is the only way to access the camera right now, until it's future replacement - navigator.mediaDevices.getUserMedia gains wider browser support.
Accessing The Camera
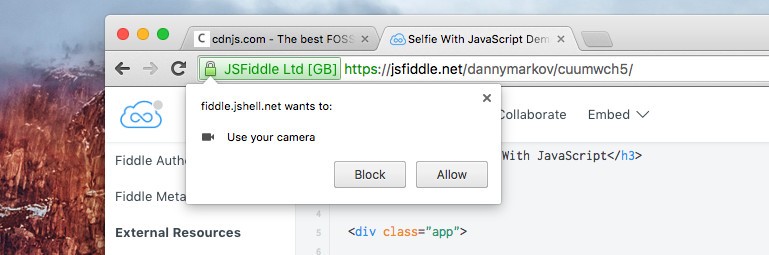
JavaScript provides a native API for accessing any camera hardware in the form of the navigator.getUserMedia method. Since it handles private data this API work only in secure HTTPS connections and always asks for user permission before proceeding.
If the user allows to enable his camera, navigator.getUserMedia gives us a video stream in a success callback. This stream consists of the raw broadcast data coming in from the camera and needs to be transformed into an actual usable media source with the createObjectURL method.
navigator.getUserMedia(
    // Options
    {
        video: true
    },
    // Success Callback
    function(stream){

        // Create an object URL for the video stream and
        // set it as src of our HTLM video element.
        video.src = window.URL.createObjectURL(stream);

        // Play the video element to show the stream to the user.
        video.play();

    },
    // Error Callback
    function(err){

        // Most common errors are PermissionDenied and DevicesNotFound.
        console.error(err);

    }
);
Taking a Still Photo
Once we have the video stream going, we can take snapshots from the camera input. This is done with a nifty trick that utilizes the mighty <canvas> element to grab a frame from the running video stream and save it in an <img> element.
function takeSnapshot(){

    var hidden_canvas = document.querySelector('canvas'),
        video = document.querySelector('video.camera_stream'),
        image = document.querySelector('img.photo'),

        // Get the exact size of the video element.
        width = video.videoWidth,
        height = video.videoHeight,

        // Context object for working with the canvas.
        context = hidden_canvas.getContext('2d');

    // Set the canvas to the same dimensions as the video.
    hidden_canvas.width = width;
    hidden_canvas.height = height;

    // Draw a copy of the current frame from the video on the canvas.
    context.drawImage(video, 0, 0, width, height);

    // Get an image dataURL from the canvas.
    var imageDataURL = hidden_canvas.toDataURL('image/png');

    // Set the dataURL as source of an image element, showing the captured photo.
    image.setAttribute('src', imageDataURL);

}
The canvas element itself doesn't even need to be visible in the DOM. We are only using its JavaScript API as a way to capture a still moment from the video.
Downloading The Photo
Of course, we not only want to take glorious selfies but we also want be able to save them for future generations to see. The easiest way to do this is with the download attribute for <a> elements. In the HTML the button looks like this:
<a id="dl-btn" href="#" download="glorious_selfie.png">Save Photo</a>
The download attribute transforms our anchor from a hyperlink into a download button. Its value represents the default name of the downloadable file, the actual file to download is stored in the href attribute, which as you can see is empty for now. To load our newly taken photo here, we can use the image dataURL from the previous section:
function takeSnapshot(){

    //...

    // Get an image dataURL from the canvas.
    var imageDataURL = hidden_canvas.toDataURL('image/png');

    // Set the href attribute of the download button.
    document.querySelector('#dl-btn').href = imageDataURL;
}
Now when somebody clicks on that button they will be prompted to download a file named glorious_selfie.png, containing the photo they took. With this our little experiment is complete!
Conclusion
We hope that you've learned a lot from this tutorial and that you now feel inspired to build some kick-ass photo apps. As always, feel free to ask questions or share ideas in the comment section below!
Bootstrap Studio
The revolutionary web design tool for creating responsive websites and apps.
Learn more
Comments 8
Hi ,
i tried the same code, but its not working in iphone safari browser
displaying:
Your browser doesn't have support for the navigator.getUserMedia interface.
can u suggest to solve this problem?
Thanks for the tutorial , it is cool i am using it in ASP.NET it work Well.
Hi thanks a lot for your efforts it helps me a lot since im not very familiar with javascript i need some help , my use case is when i take the snapshot it must sent to server to process it so how can i send the base64 to java how can i acheive that ? thank again
Holy Jesus, you don't know what live demo is? Why I need to download/setup anything if you already have a site on which you can host this?
3 years ago I tried to implement something similar to a project, after a week of hard word I did it. At the beginning of this year I started to implemented it to a jQuery plugin but time commitments made me impossible to continued. My idea was something like this tutorial, here is the github if someone would like to continue:
https://github.com/alcardm/jquery.camera.ac
Have fun.
Hi!, thanks for the tutorial it's excellent!, How I can select the other cam in my cell phone? Thanks.!
Hello Armando!
MDN states that there is an option parameter facingMode with possible values of user (selfie camera), and environment (rear camera). I haven't tried it myself and can't tell if it works or not, but it's worth a shot.
GetUserMedia constraints
Hi, thanks por the post!
I try to use but catch this errors:
Can you help me? thanks!