Make a Web App with Instagram-like Filters
In this tutorial, we are going to make a simple web app that allows you to drag a photo from your computer into the browser window, and apply instagram-like filters on it. For this purpose we are going to use a number of JavaScript libraries and plugins:
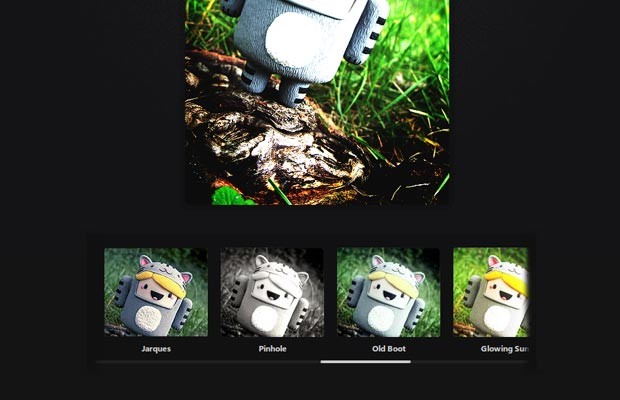
- Caman.js - this is a powerful canvas manipulation library that allows you to apply various effects and filters on an image. It comes with 18 preset filters which we will be using in this example (you can create more if you wish);
- Filereader.js - this is a lightweight wrapper around the HTML5 drag/drop events that makes them much easier to work with. It also adds a method to jQuery, so you can bind the events to a specific element;
- jQuery Mousewheel - I am using this plugin to scroll the filter container;
- In addition, we are using the latest version jQuery at the time of writing.
Also a big thanks goes to Jenn and Tony Bot for their photo.
The HTML
The first step is to write the HTML of the example:
index.html
<!DOCTYPE html>
<html>
<head>
    <meta charset="utf-8" />

    <title>Instagram-like Filters with jQuery | Tutorialzine Demo</title>
    <link href="assets/css/style.css" rel="stylesheet" />

    <!-- Include the Yanone Kaffeesatz font -->
    <link href="http://fonts.googleapis.com/css?family=Yanone+Kaffeesatz:400,200" rel="stylesheet" />

</head>
<body>

    <h1>Instagram <b>Filters</b></h1>
    <div id="photo"></div>

    <div id="filterContainer">
        <ul id="filters">
            <li> <a href="#" id="normal">Normal</a> </li>
            <li> <a href="#" id="vintage">Vintage</a> </li>
            <li> <a href="#" id="lomo">Lomo</a> </li>
            <li> <a href="#" id="clarity">Clarity</a> </li>
            <li> <a href="#" id="sinCity">Sin City</a> </li>
            <!-- 14 More filters go here -->
        </ul>
    </div>

    <!-- Libraries -->
    <script src="https://ajax.googleapis.com/ajax/libs/jquery/1.9.0/jquery.min.js"></script>
    <script src="assets/js/filereader.min.js"></script>
    <script src="assets/js/caman.full.js"></script>
    <script src="assets/js/jquery.mousewheel.min.js"></script>
    <script src="assets/js/script.js"></script>

</body>
</html>
In addition to the libraries mentioned in the intro, I am also including the script.js file which hosts the code that we will be writing in a few moments. In the head section, I am including the Yanone Kaffeesatz font from Google Web Fonts.
The JavaScript/jQuery
To make the app work, we will have to do the following:
- Accept an image on drag and drop;
- Create a new canvas element (original), with a max sizeof 500x500px (customizable) and keep it in memory;
- Listen for clicks on the filters. When one is selected:
- Create a clone of the original canvas;
- Remove any canvas elements currently on the page;
- Append the clone to the #photo div;
- If the selected filter is different from the "Normal" one, call the Caman library. Otherwise do nothing;
- Mark the selected filter with the "active" class.
- Trigger the "Normal" filter.
Now that we know what has to be done, let's start coding!
assets/js/script.js
$(function() {

    var maxWidth = 500,
        maxHeight = 500,
        photo = $('#photo'),
        originalCanvas = null,
        filters = $('#filters li a'),
        filterContainer = $('#filterContainer');

    // Use the fileReader plugin to listen for
    // file drag and drop on the photo div:

    photo.fileReaderJS({
        on:{
            load: function(e, file){

                // An image has been dropped.

                var img = $('<img>').appendTo(photo),
                    imgWidth, newWidth,
                    imgHeight, newHeight,
                    ratio;

                // Remove canvas elements left on the page
                // from previous image drag/drops.

                photo.find('canvas').remove();
                filters.removeClass('active');

                // When the image is loaded successfully,
                // we can find out its width/height:

                img.load(function() {

                    imgWidth  = this.width;
                    imgHeight = this.height;

                    // Calculate the new image dimensions, so they fit
                    // inside the maxWidth x maxHeight bounding box

                    if (imgWidth >= maxWidth || imgHeight >= maxHeight) {

                        // The image is too large,
                        // resize it to fit a 500x500 square!

                        if (imgWidth > imgHeight) {

                            // Wide
                            ratio = imgWidth / maxWidth;
                            newWidth = maxWidth;
                            newHeight = imgHeight / ratio;

                        } else {

                            // Tall or square
                            ratio = imgHeight / maxHeight;
                            newHeight = maxHeight;
                            newWidth = imgWidth / ratio;

                        }

                    } else {
                        newHeight = imgHeight;
                        newWidth = imgWidth;
                    }

                    // Create the original canvas.

                    originalCanvas = $('<canvas>');
                    var originalContext = originalCanvas[0].getContext('2d');

                    // Set the attributes for centering the canvas

                    originalCanvas.attr({
                        width: newWidth,
                        height: newHeight
                    }).css({
                        marginTop: -newHeight/2,
                        marginLeft: -newWidth/2
                    });

                    // Draw the dropped image to the canvas
                    // with the new dimensions
                    originalContext.drawImage(this, 0, 0, newWidth, newHeight);

                    // We don't need this any more
                    img.remove();

                    filterContainer.fadeIn();

                    // Trigger the default "normal" filter
                    filters.first().click();
                });

                // Set the src of the img, which will
                // trigger the load event when done:

                img.attr('src', e.target.result);
            },

            beforestart: function(file){

                // Accept only images.
                // Returning false will reject the file.

                return /^image/.test(file.type);
            }
        }
    });

    // Listen for clicks on the filters

    filters.click(function(e){

        e.preventDefault();

        var f = $(this);

        if(f.is('.active')){
            // Apply filters only once
            return false;
        }

        filters.removeClass('active');
        f.addClass('active');

        // Clone the canvas
        var clone = originalCanvas.clone();

        // Clone the image stored in the canvas as well
        clone[0].getContext('2d').drawImage(originalCanvas[0],0,0);

        // Add the clone to the page and trigger
        // the Caman library on it

        photo.html(clone);

        var effect = $.trim(f[0].id);

        Caman(clone[0], function () {

            // If such an effect exists, use it:

            if( effect in this){
                this[effect]();
                this.render();
            }
        });

    });

    // Use the mousewheel plugin to scroll
    // scroll the div more intuitively

    filterContainer.find('ul').on('mousewheel',function(e, delta){

        this.scrollLeft -= (delta * 50);
        e.preventDefault();

    });

});
This example works in all browsers which support file drag/drop. Some of the filters are computationally intensive, so you will get a bit of a lag before the results show on screen. I have limited the maximum width/height of the image to be 500px in order to speed things up a bit, but you can change these values to your liking.
Update: I published an enhancement to this tutorial that adds the option to download the resulting images. You might want to check it out after you finish with this post.
Done!
It would be cool to combine this example with our Photobooth tutorial and end up with a real Instagram-like app in your browser. But I will leave this as an exercise for the reader :)
Bootstrap Studio
The revolutionary web design tool for creating responsive websites and apps.
Learn more
this is absolutely nice! Great stuff
btw how could you combine that with the photobooth? I mean, you take the picture with flash and after that you post it... there's nothing in between.. how could snap the picture and let people choose an effect, it's flash.. I'm probably wrong, but if you tell me that can be done I try. Can be done?
Amazing discovers as always! Thanks, mane!
I think that there was an API to receive the image from the flash plugin as a base64 encoded string and display it in a canvas. Another option is to use web cameras directly using the getUserMedia API in Firefox/Chrome (and soon others).
Nice, very nice.
WOW! it's amazing ) Thanks for post
How about saving or uploading the image once the filter is applied?
You will need to have some server-side code to upload the image. Triggering a download only with JavaScript is possible, but I am not sure which browsers support it.
good concept..liked:)
I think is important to implement print feature for your post!
that's excellent :)
I agree with adding this to, one of my favorite tutorial, the Photobooth.
Good job! Again.
Would love to see an example where the image can be saved or downloaded.
Great work, once again!
Yes, an example how the filtered images can be saved on a server would be great. Is this even possible?
Great script I found a solution for saving the canvas into image:
http://www.nihilogic.dk/labs/canvas2image/
how is it possible to save an image after processing the filter? Please write instructions
Another great tutorial going to have to try this one out, aswell.
Thanks martin
How to save the image after adding the effect?
I create a simple web application according to your learning.
I add save image feature to your sample in Bainsta.com here
Thanks my great teacher ;)
That is nice. I like it.
Your welcome my friend ;)
Very nice AmirHossein!
Hey Martin, thanks for the amazing post again~and I also noticed the issue how to save & output the photo without really storing it on server side, I mean, by using HTML5 features. I saw another good post about HTML5 pic uploading, http://html5demos.com/file-api-simple. Pics are transferred to code so it's much convenient for visitors to get the output.
I think perhaps we could combine both works (drag&upload, then pic format change). It might be feasible. Any idea on that :)
Hi Maocan,
Dear did you find the solution with choose file option ?If you did please share.
Awesome tuto. I like it, thanks.
could you tell me how to use button to get the image instead of the drag and drop ? or any workaround to make the drag and drop can be clickable to select image and display it inside the canvas
Thanks for introducing me with Caman.js. Would be useful for future project.
I love this in theory!!! I'm noticing that there is quite a difference in image quality between a server-based solution and a client-based solution - so much so, that I don't think I can go this route yet unless i'm missing something. These filters cause the image to look very pixellated whereas an image generated by the server with say imageMagik filters look as if it came out of photoshop. Believe me - I would rather do this all client-side but maybe i'll need to wait a few years.
Hey!
Great article! but I don't see the code that deals with the #normal item/effect,
Any thoguts?
I just opened a stackoverflow anser: http://stackoverflow.com/questions/15881829/camanjs-usage-without-nodejs
thanks for sharing!
This is amazing!
Nice tutorial. i liked it, but Is there any way to reduce the quality of image as i was trying to POST it to server using ajax.
Great article, thanks!
How could you modify the code to accept a URL as the image source as opposed to dragging and dropping into the browser? Is this possible?
I Love It but i want to dynamically add image without drag and drop??
how can i do it?