Making a Beautiful HTML5 Portfolio
In today's tutorial we will be making a beautiful HTML5 portfolio powered by jQuery and the Quicksand plugin. You can use it to showcase your latest work and it is fully customizable, so potentially you could expand it to do much more.
The HTML
The first step is to write down the markup of a new HTML5 document. In the head section, we will include the stylesheet for the page. The jQuery library, the Quicksand plugin and our script.js will go right before the closing body tag:
index.html
<!DOCTYPE html>
<html>
    <head>
        <meta charset="utf-8" />

        <title>Making a Beautiful HTML5 Portfolio | Tutorialzine Demo</title>

        <!-- Our CSS stylesheet file -->
        <link rel="stylesheet" href="assets/css/styles.css" />

        <!-- Enabling HTML5 tags for older IE browsers -->
        <!--[if lt IE 9]>
          <script src="http://html5shiv.googlecode.com/svn/trunk/html5.js"></script>
        <![endif]-->
    </head>

    <body>

        <header>
            <h1>My Portfolio</h1>
        </header>

        <nav id="filter">
            <!-- The menu items will go here (generated by jQuery) -->
        </nav>

        <section id="container">
            <ul id="stage">
                <!-- Your portfolio items go here -->
            </ul>
        </section>

        <footer>
        </footer>

        <!-- Including jQuery, the Quicksand plugin, and our own script.js -->

        <script src="http://ajax.googleapis.com/ajax/libs/jquery/1.6.1/jquery.min.js"></script>
        <script src="assets/js/jquery.quicksand.js"></script>
        <script src="assets/js/script.js"></script>

    </body>
</html>
In the body, there are a number of the new HTML5 elements. The header holds our h1 heading (which is styled as the logo), the section element holds the unordered list with the portfolio items (more lists are added by jQuery, as you will see later), and the nav element, styled as a green bar, acts as a content filter.
The #stage unordered list holds our portfolio items. You can see what these items should look like below. Each of them has a HTML5 data attribute, which defines a series of comma-separated tags. Later, when we use jQuery to loop through this list, we will record the tags and create categories that can be selected from the green bar.
<li data-tags="Print Design">
    <img src="assets/img/shots/1.jpg" />
</li>

<li data-tags="Logo Design,Print Design">
    <img src="assets/img/shots/2.jpg" />
</li>

<li data-tags="Web Design,Logo Design">
    <img src="assets/img/shots/3.jpg" />
</li>
You can put whatever you want in these li items and customize the portfolio further. The Quicksand plugin will handle the animated transitions of this list, so you are free to experiment.

The jQuery
What the Quicksand plugin does, is compare two unordered lists of items, find the matching LIs inside them, and animate them to their new positions. The jQuery script we will be writing in this section, will loop through the portfolio items in the #stage list, and create a new (hidden) unordered list for each of the tags it finds. It will also create a new menu option, which will trigger the quicksand transition between the two lists.
First we need to listen for the ready event (the earliest point in the loading of the page where we can access the DOM), and loop through all the li items detecting the associated tags.
script.js - Part 1
$(document).ready(function(){

    var items = $('#stage li'),
        itemsByTags = {};

    // Looping though all the li items:

    items.each(function(i){
        var elem = $(this),
            tags = elem.data('tags').split(',');

        // Adding a data-id attribute. Required by the Quicksand plugin:
        elem.attr('data-id',i);

        $.each(tags,function(key,value){

            // Removing extra whitespace:
            value = $.trim(value);

            if(!(value in itemsByTags)){
                // Create an empty array to hold this item:
                itemsByTags[value] = [];
            }

            // Each item is added to one array per tag:
            itemsByTags[value].push(elem);
        });

    });
Each tag is added to the itemsByTags object as an array. This would mean that itemsByTags['Web Design'] would hold an array with all the items that have Web Design as one of their tags. We will use this object to create hidden unordered lists on the page for quicksand.
It would be best to create a helper function that will handle it for us:
script.js - Part 2
function createList(text,items){

    // This is a helper function that takes the
    // text of a menu button and array of li items

    // Creating an empty unordered list:
    var ul = $('<ul>',{'class':'hidden'});

    $.each(items,function(){
        // Creating a copy of each li item
        // and adding it to the list:

        $(this).clone().appendTo(ul);
    });

    ul.appendTo('#container');

    // Creating a menu item. The unordered list is added
    // as a data parameter (available via .data('list')):

    var a = $('<a>',{
        html: text,
        href:'#',
        data: {list:ul}
    }).appendTo('#filter');
}
This function takes the name of the group and an array with LI items as parameters. It then clones these items into a new UL and adds a link in the green bar.
Now we have to loop through all the groups and call the above function, and also listen for clicks on the menu items.
script.js - Part 3
// Creating the "Everything" option in the menu:
createList('Everything',items);

// Looping though the arrays in itemsByTags:
$.each(itemsByTags,function(k,v){
    createList(k,v);
});

$('#filter a').live('click',function(e){
    var link = $(this);

    link.addClass('active').siblings().removeClass('active');

    // Using the Quicksand plugin to animate the li items.
    // It uses data('list') defined by our createList function:

    $('#stage').quicksand(link.data('list').find('li'));
    e.preventDefault();
});

// Selecting the first menu item by default:
$('#filter a:first').click();
Great! Now that we have everything in place we can move on to styling the page.
The CSS
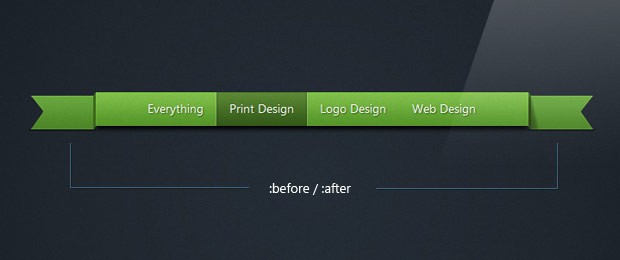
Styling the page itself is not that interesting (you can see the CSS for this in assets/css/styles.css). However what is more interesting is the green bar (or the #filter bar), which uses the :before / :after pseudo elements to add attractive corners on the sides of the bar. As these are positioned absolutely, they also grow together with the bar.
styles.css
#filter {
    background: url("../img/bar.png") repeat-x 0 -94px;
    display: block;
    height: 39px;
    margin: 55px auto;
    position: relative;
    width: 600px;
    text-align:center;

    -moz-box-shadow:0 4px 4px #000;
    -webkit-box-shadow:0 4px 4px #000;
    box-shadow:0 4px 4px #000;
}

#filter:before, #filter:after {
    background: url("../img/bar.png") no-repeat;
    height: 43px;
    position: absolute;
    top: 0;
    width: 78px;
    content: '';

    -moz-box-shadow:0 2px 0 rgba(0,0,0,0.4);
    -webkit-box-shadow:0 2px 0 rgba(0,0,0,0.4);
    box-shadow:0 2px 0 rgba(0,0,0,0.4);
}

#filter:before {
    background-position: 0 -47px;
    left: -78px;
}

#filter:after {
    background-position: 0 0;
    right: -78px;
}

#filter a{
    color: #FFFFFF;
    display: inline-block;
    height: 39px;
    line-height: 37px;
    padding: 0 15px;
    text-shadow:1px 1px 1px #315218;
}

#filter a:hover{
    text-decoration:none;
}

#filter a.active{
    background: url("../img/bar.png") repeat-x 0 -138px;
    box-shadow: 1px 0 0 rgba(255, 255, 255, 0.2),
                -1px 0 0 rgba(255, 255, 255, 0.2),
                1px 0 1px rgba(0,0,0,0.2) inset,
                -1px 0 1px rgba(0,0,0,0.2) inset;
}
With this our beautiful HTML5 portfolio is complete!
Conclusion
You can use this template to present your work. The best thing about it is that it's really easy to customize. You only need to change the contents of the initial LI items of the #stage list, and specify some new tags - the script will do the rest. If the visitor doesn't have JavaScript enabled, they will still see all your portfolio items, which is also good for SEO purposes.
Bootstrap Studio
The revolutionary web design tool for creating responsive websites and apps.
Learn more
very nice, love your ribbon style navigation
Very nice portfolio solution. If I ever get round to doing my site I will look into this one again.
Slowly but surely you are rising up as one of the greats online. Keep it up mate.
it's so beautiful master...
so elegant ;)
Great portfolio Tutorial!
Very nice as always.
wow this is like desandros isotope plugin, really impressive! I'd love to see pushstate functionality though. It's the new black nowadays I've heard
wow that's fantastic dude keep up !
Very nice portfolio idea! Thank you for the article!
I've already seen this before similar to QuickSand http://razorjack.net/quicksand/ which I think has more and possibly better functionality. However, this is very nice as well and I guess another alternative with a little less coding.
Thank you for the tutorial. I'm using it on my site now :) More power to you!
Been fighting with this all night, is there a way to make it working with ANY *box plugin?
I basically tried every single one and i can't get it do its job. Currently testing chillbox.
Also I wonder if it's possible to have some kind of "start page" ?
I'd like to make an introduction thing
thanks in advance
You can make it work by adding a callback to the Quicksand plugin like this:
$('#stage').quicksand(link.data('list').find('li'),function(){
    // FancyBox initialization code.
});
In this callback you will have to call the plugin with the visible elements only (given that you have enclosed the images in the LIs in an anchor element):
$('a:visible').fancybox({...});Remember to add proper rel attributes to these links, which is required by fancybox to display the images as a group.
Thanks for the FancyBox callback Martin.
I'm having trouble getting fancybox to work. I tried adding the callback to jquery.quicksand.js. But I didn't understand what do with this line of code
$('a:visible').fancybox({...});
Hi Jeff, i'm having the same problem right now, have you already solved the question?
Thank you.
Hey this is incredibly awesome...
Thanks Martin..
Was wondering if we can have smooth pop up images of bigger size linked to each thumb nails?
I tried adding hyper link, it opens the new image in the new window, which is annoying.. I need a image popping up with a close button....
Thanks,
Mithun
Will Fancybox or another lightbox plugin work in conjunction with quicksand plugin? If so what is best way to incorporate?
nicely done. I love reading your tutorials so keep'em coming
Oh man! You guys are just amazing. This tutorial is very helpful and beautifully done.
Love the end result. Its so beautiful !
Awesome!
Your timing is simply superb Martin, It's like you heard my nigtmares!
I'm currently trying to integrate quicksand into my new site and this is just perfect!
Many thanks.
very nice. It will be useful for my next project
Incredible article, HTML5 is awesome!
Love it!
thx, awesome tut really helpful and i love it =)
Good portfolio. Let me try to implement in my site.
What if I want to implement more than one kind of filter?
So I might want to filter on either media (painting/drawing/digital) or themes (abstract/figurative)?
The simplest solution for providing multiple filters would seem to be to prepare the tags something like this, but I'm struggling to implement this solution...
data-tags="{Media:Logo Design,Print Design},{Theme:Figurative,Portraiture}"
For my purposes, while dynamic, the dataset is likely to remain fairly small so it wouldn't matter much if only one kind of filter could be applied at any one time.
Nevermind, found exactly what I was looking for over at:http://blog.adamroderick.com/2010/11/multiple-filters-with-jquery-quicksand/
Great tutorial! Thanks for sharing.
Great tutorial but there needs to be a push function on the image or something. I am trying to combine another jquery code with this one (pirobox) but I havent had any luck. I've searched and tried everything I can think of but still no results. Would you know how to seamlessly make quicksand and pirobox work together or make a tutorial that has a combination of pirobox and quicksand. I'd appreciate :)
Thanks
This is a nice effect and could be useful in a lot of different contexts, but it is rendered virtually useless due to its inability to play nicely with any kind of *box plugin.
Very beautiful! Was looking for this for a while now. Thanks!
Fantastic tutorial, thank you for this! Gonna modify it and use it on my own site.
Im still getting a vast amount on whitespace under my container, any suggestions?
awesome designs!!!
nicely designed and well explained . thanks
Very nice! Can't wait to use it for one of my projects.
I really like this html5 demo. I tried to play with it like changing the image contents. But why is it that the slideshow stop functioning? Any helpful advice?
Newbie to coding.
Thanks.
Its Definitely good bookmarking for future reference.
Regards
Can
Awesome tut,helped me a lot and even amazing effects thanks a lot....
Love the use of pseudo elements for the styling of banner. and good transitions on the images.
I have a question, i don't know much about this, but i´m using your great work for a personal portfolio an i need know if it its possible to add a link in the filter menu for an external html page?
I can show you what i'm doing if you want.
Thank you
Luís
Yes it is possible.
// For the script.js file. The location is before the closing of the entire script's Document Ready Function. Exactly: End of file and above }); // This jQuery line will search the Quicksand Menu Names for one named 'Bing' and attach a onclick Attribute for it. $('#filter a:contains("Bing")').attr('onclick','window.location="http://www.bing.com"'); // This next jQuery line will allow you can move the Quicksand 'Bing' Menu option to be at a different position on the Quicksand Menu of Names. // Use a NUMERIC value below representing the position on the Quicksand Menu (default 0, not applicable 1, new position starts at 2, max position # is the maximum Quicksand Menu Name count). Shown below is value 5 (It's moved to the end). "Not applicable 1" is because it's already the 1st item in the list. $('#filter a:nth-child(5)').after( $('#filter a:contains("Bing")') ); // For the index.html page in the section of #stage you will create a Button for the Menu. The name should not already be in use, it will remain empty. This should be the first li in your list (but you can change later). <li data-tags="Bing" style="visibility:hidden; position:absolute"></li>THANK YOU!!!
First of all arttronics, i really appreciate your help, people like you are great.
This is working, i need a portfolio online, but i don't have the knowledge to resolve some of this questions. So thank you.
This is the portfolio i am building:
http://www.lslx-web.com/teste/index.html
The last link of the menu is the one that you helped me with.
I have another problem to resolve with fancybox, i know you are a fan of shadowbox, but i would like to know if you can help me.
The sandbox plugin, which is cloning the elements in order to
arrange them easily, it clones the first set 5 times and the rest 3 times, so my first gallery has 7 images by 5 sandbox clones = 35 images in the gallery, second gallery has 4 by 3 clones = 12 images in the gallery and so on and so forth.
What i really want is to show the set once. I don't know how to do it.
So if you could just point me the away, i really appreciate.
Thank you once again.
By the away, this is a great tutorial Martin.
@artronics
HIi I was wondering if there was a way to set the window location so that a certain link is active.
For ex.. example.com/#contact
This would make the link contact active.
This jQuery will activate Quicksand Menu Filter 5 it that is your Contact Button. Change the number as you need to:
$('#filter a:nth-child(5)').click();
However, you may want to setup your Contact Button differently from the above example that uses a URL. Try this:
$('#filter a:contains("Contact")').click(function() {
document.getElementById('myForm').click();
return false; // this prevents the filter from hiding everything so the 'myForm' becomes active if it's an ID for Shadowbox
});
The < pre > tags don't seem to work anymore. REPLACE all single quotes above with STANDARD single quotes. The message box has altered the markup.
I am a fan of Shadowbox!
For those users who want to use it with this lightbox alternative, I have created a modified index.html and script.js files that demonstrates correct usage with this plugin.
Here is the direct link at the Shadowbox Forum for these modified files:
index_SB.html
script_SB.js
TIP: The index_SB.html and script_SB.js files should be right mouse-clicked to access the context menu. From there, save them to your hard drive.
Now it works but anyway the images are small inside the box. They aren't actually the full image size.
As explained in the script_SB.js file, you need to remove forced Width and Height settings that's used for just the demo's purpose. Search that file for Normally NOT desired for IMGs. to get to the correct line.
Reviewing the script_SB.js file I can see it might be convenient to replace items 1 -5 with a single function to be found on the parent page.
That parent page function would then contain items 1 - 5 to allow for easy maintenance without having to update settings/other options in the .js file.
For any Shadowbox related issues, I implore you to visit the Shadowbox Forum with the link provided in the above post or if it's moved by that forum search for "Quicksand Demo featuring Shadowbox" at: http://www.shadowbox-js.com/forum.html
I'm trying to remove and add links/text in the nav, but it's created by jQuery, right? How would I go about removing one link?
The links are created by the data-tags in the #stage li. By having # of categories = the # of links.
Great tutorial! works great too!
I'm only having a problem with Lightbox.
As I already saw some other people having this problem or something simular.
Somehow, somewhere, the code from Lightbox and Quicksand don't get along. If I have the code for Lightbox disabled, Quicksand will work just fine, but if I enable it, only Lightbox is working.
I'm don't know that much about jQuery or Javascript, so I was wondering if anybody could please help me with the problem.
Hi, I used this tutorial in order to have content on my page fade in and out. The only problem is that each link does not have a distinct url. If you have any advise on the problem I would appreciate it.
p.s. The reason it is a problem is because I have a contact form which reloads the page after submitting, so it resets to the home content instead of the Contact content.
Here's a solution for those using jQuery lightbox clones in Gallery mode that cause Quicksand to show those duplicated items.
// This jQuery shown is part of your customized .js file for use with quicksand.js
$('#stage').quicksand(link.data('list').find('li'), function() {
//
// Place your usual jQuery or Javascript GALLERY markup here with CLONING issue (not for lightbox clones that cache gallery links - use their API instead).
//
// This next jQuery line should be placed prior to the closing of your function.
// All hidden items Quicksand has set on the webpage will be removed which in turns removes the CLONED jQuery elements.
// When the Quicksand Menu Filter Button is used again, your filtered items will remain correct in gallery length.
$('section#container').find('ul.hidden').remove();
});
Here’s a solution for those using jQuery lightbox clones in Gallery mode that cause Quicksand to show those duplicated items.
// This jQuery shown is part of your customized .js file for use with quicksand.js
$(‘#stage’).quicksand(link.data(‘list’).find('li’), function() {
//
// Place your usual jQuery or Javascript GALLERY markup here with CLONING issue (not for lightbox clones that cache gallery links – use their API instead).
//
// This next jQuery line should be placed prior to the closing of your function.
// All hidden items Quicksand has set on the webpage will be removed which in turns removes the CLONED jQuery elements.
// When the Quicksand Menu Filter Button is used again, your filtered items will remain correct in gallery length.
$(‘section#container’).find(‘ul.hidden’).remove();
});
All quotes are single quotes. This forum is modifying the code.
Single Quote ≠ Left Quote ≠ Right Quote
How can you get sort features to work? The jQuery Quicksand provide such feature but your implementation is very simple but I find impossible to add any filter option to it.
Can anybody please help?
Hey, thanks for your tutorial, it helped me a lot. :)
But i have a single question, hope you have the time to answer me.
How can i erase the instances of quicksand plugin from the page without leaving the HTML page? i made a button "Clear" that has no tags at all, and that made what i want, but there must be a better and cleaner way, maybe erasing the clone?
thanks.
Hi! I used your script for my own website, is works perfectly. I had only one question, is it possible for a filter to be active on page load? Let say I have 3 filters (filter 1, filter 2 and filter 3).
On page load I get the filters Everything, Filter 1, Filter 2 and Filter 3. Everything is the selected filter. I want Filter 2 to be active on page load. How can I do this?
Thanks in advance,
JayD
I love this design!
Can i ask how i might be able to make each image clickable and have a larger image pop up in the centre of the screen? I'm learning as go and I have tried a number of ways already but they seem to conflict with the js.
If you could take the time to contact me i'd appreciate the effort.
Many thanks,
Dave
It's perfect!! Good job!! Many thanks!!
My problem is that in some screen resolutions the list items are not in the center of the div while the ul is centered. Does anyone know a solution?
Thanks!
How would the code look like...
hi first all thanks for your blog and all the Helpful article's
just have a question
i use in some gray-scale plugin to change the style of the pictures in portfolio to gray-scale but isn't work in first page load
just when i'm clicking on some menu item it's show me the gray-scale pictures
i can use in any gray-scale plugin to do it
thanks for you help again
Could some please explain to me how the callback to quicksand works? and if that would allow me to use pretty Photo, because my images show in a new window rather than the lightbox, and i think the callback maybe my issue?
It seems somehow were are recreating the wheel, when flash already did all this. I do not see flash going anywhere, at least not on desktop browsers.
Dear Martin, excellent work!!! I'd ask if there is a possibility to implement with jQuery a filter/menu with submenu, suckerfish like, do to the fact I would like to change the main page of my site and as you can see there are a lot of menu voices and if I use your solution I' ll obtain a really long menu list while with menu/submenu I' ll obtain a short list..... Is it possible??? Can you help me!!!
Thanks in advantage for your cooperation
mrzpro
I've been fighting this issue with Quicksand and Prettyphoto for some time now.. When a filter is clicked, PrettyPhoto no longer works, and when an image is clicked, it opens the image in its own window, with no lightbox. I really don't understand the callback fix at all. Take a look at the issue at hand: (http://justinjwilson.com). I'm pretty close to switching to Isotope or using my own jQuery!
Try using Shadowbox instead of your prettyphoto lightbox.
http://www.shadowbox-js.com/
Shadowbox is easily customized as well! :)
Thank you so much for all these wonderful tutorials! You are doing a great job!!
Is there a way to put the categories inside a menu?
So, I have a menu like that:
I want to create a sub-menu using the categories from Portfolio inside this menu.
If I need a "normal" sub-menu, I can do that:
I just want this sub menu could be made by the categories I have in my portfolio page, and it's working great.
Or I can put it out in a "normal" way, but I don't know what to put in the href tag.
Thanks in advance,
Joao Tostes
Does this work on all browsers? :D
Hi, thank you for this beautiful filter effect Martin. I had my programmer work on this, unfortunately, he told me there is a maximum number of items like less than 30 only. I'll be putting about a hundred more or less. Is this possible? Please advice so I could find other options to use in presentation. I'd appreciate your time. Thanks.
Dear Martin, excellent work!!! I'd ask if there is a possibility to implement with jQuery a filter/menu with submenu, suckerfish like, do to the fact I would like to change the main page of my site and as you can see there are a lot of menu voices and if I use your solution I' ll obtain a really long menu list while with menu/submenu I' ll obtain a short list..... Is it possible??? Can you help me!!!
Thanks in advantage for your cooperation
mrzpro
Awesome!Great!Perfert!Beautifull...
fully perfect for my portfolio..
i will add it to my new website with some design changes.I will show yo uthe output in 3-4 weeks after.
again Thanks for this good thing:)
Nice job, great to see so much inovation with HTML5 for the use of pseudo elements for most styled menus!
I tried to add this to my blog(blogger) home page as a navigation, it works beautifully.
But when I publish a post the animation doesn't work. Instead the menu shows everything irrespective of any selection. Anyone have suggestions?
Hello,
Great job, can you make this code compatible jquery 1.9 ?
Live function is depreciated.
Thanks
just replace the line
$('#filter a').live('click',function(e){
with
$('#filter').on('click', 'a', function(e){
and nice example (much better than the original quicksand examples), thank you!
Almost have this working 100%. The "Everything" link is not clickable for some reason and I can't view all items. It displays all items initially, just when you click on another category its not clickable. Have you come across this problem before?
I am a javascript novice. Is there a way to have images displayed to represent the data-tags instead of the auto-generated options (Everything, Print Design, Logo Design and Web Design)? I have a finite number of options and do not need them to be auto-created.
Hello, great tutorial!
I managed to fit in wordpress, but I have a problem that I can't solve.
I'm trying to add in the menu/filter also an ID with the name of the category. I would get something like this, so I can manage different categories:
<a href="#">Everything</a>
<a id="webdesign" href="#">Webdesign</a>
<a id="illustration" href="#">Illustration</a>
<a id="blog" href="#" class="active">Blog</a>
Someone can help me?
Thank you!
Nathalie
how can I change the menu names inside the filter menu strip. I tried a lot but couldn't find this. can you tell me this ?