Simple AJAX Commenting System
This time, we are making a Simple AJAX Commenting System. It will feature a gravatar integration and demonstrate how to achieve effective communication between jQuery and PHP/MySQL with the help of JSON.
Note: This tutorial is quite old and doesn't work in PHP7 and above. We are keeping it online only as a reference.
Step 1 - XHTML
First, lets take a look at the markup of the comments. This code is generated by PHP in the Comment class, which we are going to take a look at in a moment.
demo.php
<div class="comment">
    <div class="avatar">
        <a href="https://tutorialzine.com/">
        <img src="http://www.gravatar.com/avatar/112fdf7a8fe3609e7af2cd3873b5c6bd?size=50&default=http%3A%2F%2Fdemo.tutorialzine.com%2F2010%2F06%2Fsimple-ajax-commenting-system%2Fimg%2Fdefault_avatar.gif">
        </a>
    </div>

    <div class="name"><a href="https://tutorialzine.com/">Person's Name</a></div>
    <div title="Added at 06:40 on 30 Jun 2010" class="date">30 Jun 2010</div>
    <p>Comment Body</p>
</div>
The avatar div contains a hyperlink (if the user entered a valid URL when submitting the comment) and an avatar image, which is fetched from gravatar.com. We will return to this in the PHP step of the tut. Lastly we have the name and time divs, and the comment body.
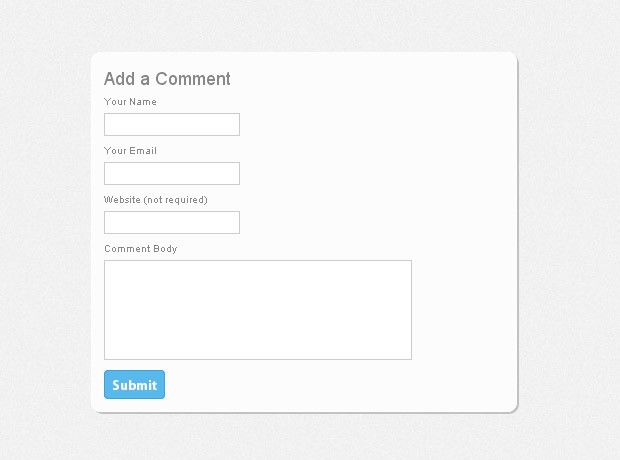
The other important element in the XHTML part is the comment form. It is sent via POST. All fields except for the URL field are required.
demo.php
<div id="addCommentContainer">
    <p>Add a Comment</p>
    <form id="addCommentForm" method="post" action="">
        <div>
            <label for="name">Your Name</label>
            <input type="text" name="name" id="name" />

            <label for="email">Your Email</label>
            <input type="text" name="email" id="email" />

            <label for="url">Website (not required)</label>
            <input type="text" name="url" id="url" />

            <label for="body">Comment Body</label>
            <textarea name="body" id="body" cols="20" rows="5"></textarea>

            <input type="submit" id="submit" value="Submit" />
        </div>
    </form>
</div>
The form is submitted via AJAX. The validation is performed entirely in the backend by submit.php, as you will see in the jQuery step of the tutorial. Every field has a corresponding label element, with an appropriate for attribute.
Step 2 - PHP
PHP handles the communication with the MySQL database and generates the markup of the comments. It is also on the receiving end of the AJAX requests and inserts the comment data to the comments table. You can see the code that prints the comments to the page below.
demo.php
/*
/   Select all the comments and populate the $comments array with objects
*/

$comments = array();
$result = mysql_query("SELECT * FROM comments ORDER BY id ASC");

while($row = mysql_fetch_assoc($result))
{
    $comments[] = new Comment($row);
}
The MySQL query selects all the entries from the database and fills the $comments array with objects of the comment class, which you will see below. This array is outputted later in the execution of the script.
demo.php
/*
/   Output the comments one by one:
*/

foreach($comments as $c){
    echo $c->markup();
}
Each comment has a markup() method, which generates valid HTML code ready to be printed to the page. You can see the definition of this method and the class below.
The class takes a row from the database (fetched with mysql_fetch_assoc() ) and stores it in the private variable $data. It is available only to the methods of the class and cannot be accessed from outside.
comment.class.php - Part 1
class Comment
{
    private $data = array();

    public function __construct($row)
    {
        /*
        /   The constructor
        */

        $this->data = $row;
    }

    public function markup()
    {
        /*
        /   This method outputs the XHTML markup of the comment
        */

        // Setting up an alias, so we don't have to write $this->data every time:
        $d = &$this->data;

        $link_open = '';
        $link_close = '';

        if($d['url']){

            // If the person has entered a URL when adding a comment,
            // define opening and closing hyperlink tags

            $link_open = '<a href="'.$d['url'].'">';
            $link_close =  '</a>';
        }

        // Converting the time to a UNIX timestamp:
        $d['dt'] = strtotime($d['dt']);

        // Needed for the default gravatar image:
        $url = 'http://'.dirname($_SERVER['SERVER_NAME'].$_SERVER["REQUEST_URI"]).
                '/img/default_avatar.gif';

        return '

            <div class="comment">
                <div class="avatar">
                    '.$link_open.'
                    <img src="http://www.gravatar.com/avatar/'.
                md5($d['email']).'?size=50&default='.
                urlencode($url).'" />
                    '.$link_close.'
                </div>

                <div class="name">'.$link_open.$d['name'].$link_close.'</div>
                <div class="date" title="Added at '.
                date('H:i \o\n d M Y',$d['dt']).'">'.
                date('d M Y',$d['dt']).'</div>
                <p>'.$d['body'].'</p>
            </div>
        ';
    }
This script uses gravatar to present avatars in the comments. For those of you, who have not used gravatar, this is a really useful service, which lets you associate an avatar with your email address. The avatar image can easily be fetched by passing an md5() encoded hash of your email address to gravatar.com. This is exactly what we do on line 48.
Notice line 39 above it - the script tries to figure out the URL at which it is located, and determines the exact address of the default_avatar.gif image. This gif is passed to gravatar along the md5 hash, so if no avatar was found for this particular email, the fallback image is displayed instead.
comment.class.php - Part 2
 public static function validate(&$arr)
    {
        /*
        /   This method is used to validate the data sent via AJAX.
        /
        /   It return true/false depending on whether the data is valid, and populates
        /   the $arr array passed as a paremter (notice the ampersand above) with
        /   either the valid input data, or the error messages.
        */

        $errors = array();
        $data   = array();

        // Using the filter_input function introduced in PHP 5.2.0

        if(!($data['email'] = filter_input(INPUT_POST,'email',FILTER_VALIDATE_EMAIL)))
        {
            $errors['email'] = 'Please enter a valid Email.';
        }

        if(!($data['url'] = filter_input(INPUT_POST,'url',FILTER_VALIDATE_URL)))
        {
            // If the URL field was not populated with a valid URL,
            // act as if no URL was entered at all:

            $url = '';
        }

        // Using the filter with a custom callback function:

        if(!($data['body'] = filter_input(INPUT_POST,'body',FILTER_CALLBACK,
                        array('options'=>'Comment::validate_text'))))
        {
            $errors['body'] = 'Please enter a comment body.';
        }

        if(!($data['name'] = filter_input(INPUT_POST,'name',FILTER_CALLBACK,
                        array('options'=>'Comment::validate_text'))))
        {
            $errors['name'] = 'Please enter a name.';
        }

        if(!empty($errors)){

            // If there are errors, copy the $errors array to $arr:

            $arr = $errors;
            return false;
        }

        // If the data is valid, sanitize all the data and copy it to $arr:

        foreach($data as $k=>$v){
            $arr[$k] = mysql_real_escape_string($v);
        }

        // Ensure that the email is in lower case (for a correct gravatar hash):
        $arr['email'] = strtolower(trim($arr['email']));

        return true;

    }
The validate() method above (also part of the class) is defined as static. This means that it can be evoked directly like Comment::validate(), without the need of creating an object of the class. What this method does, is validate the input data which is submitted via AJAX.
This method uses the new filter functions, which are available as of PHP 5.2.0. These allow us to easily validate and filter any input data that is passed to the script. For example filter_input(INPUT_POST,'url',FILTER_VALIDATE_URL) means that we are checking whether $_POST['url'] is a valid URL address. If it is, the function returns the value of the variable, otherwise it return false.
This is really useful, as up until now, we had to use custom regular expressions to validate data (and have series of if statements). Also, another advantage is that this data is fetched before any configuration-specific transformations (like magic quotes) are applied.
We also have the option of specifying a custom function which is going to apply some more advanced modifications of the data, as you can see from lines 31 and 37.
comment.class.php - Part 3
 private static function validate_text($str)
    {
        /*
        /   This method is used internally as a FILTER_CALLBACK
        */

        if(mb_strlen($str,'utf8')<1)
            return false;

        // Encode all html special characters (<, >, ", & .. etc) and convert
        // the new line characters to <br> tags:

        $str = nl2br(htmlspecialchars($str));

        // Remove the new line characters that are left
        $str = str_replace(array(chr(10),chr(13)),'',$str);

        return $str;
    }

}
The last method is validate_text, which we are passing as a callback function in the two filter_input calls above. It encodes all special HTML characters, effectively blocking XSS attacks. It also replaces the newline characters with <br /> line breaks.
submit.php
/*
/   This array is going to be populated with either
/   the data that was sent to the script, or the
/   error messages:
/*/

$arr = array();

$validates = Comment::validate($arr);

if($validates)
{
    /* Everything is OK, insert to database: */

    mysql_query("   INSERT INTO comments(name,url,email,body)
                    VALUES (
                        '".$arr['name']."',
                        '".$arr['url']."',
                        '".$arr['email']."',
                        '".$arr['body']."'
                    )");

    $arr['dt'] = date('r',time());
    $arr['id'] = mysql_insert_id();

    /*
    /   The data in $arr is escaped for the mysql insert query,
    /   but we need the unescaped text, so we apply,
    /   stripslashes to all the elements in the array:
    /*/

    $arr = array_map('stripslashes',$arr);

    $insertedComment = new Comment($arr);

    /* Outputting the markup of the just-inserted comment: */

    echo json_encode(array('status'=>1,'html'=>$insertedComment->markup()));

}
else
{
    /* Outputting the error messages */
    echo '{"status":0,"errors":'.json_encode($arr).'}';
}
submit.php receives the comment form data via an AJAX request. It validates it and outputs a JSON object with either the XHTML markup of the successfully inserted comment, or a list of error messages. jQuery uses the status property to determine whether to display the error messages or add the comment markup to the page.
You can see two example responses below.
Successful response
{
    "status": 1,
    "html": "Html Code Of The Comment Comes Here..."
}
The html property contains the code of the comment, similar to markup in step one.
Failure response
{
    "status": 0,
    "errors": {
        "email": "Please enter a valid Email.",
        "body": "Please enter a comment body.",
        "name": "Please enter a name."
    }
}
On failure, jQuery loops through the errors object, and outputs the errors next to the fields that caused them.
Step 3 - CSS
Now that we have all the markup properly generated and displayed on the page, we can move on to styling it.
styles.css - Part 1
.comment,
#addCommentContainer{

    /* Syling the comments and the comment form container */

    padding:12px;
    width:400px;
    position:relative;
    background-color:#fcfcfc;
    border:1px solid white;
    color:#888;
    margin-bottom:25px;

    /* CSS3 rounded corners and drop shadows */

    -moz-border-radius:10px;
    -webkit-border-radius:10px;
    border-radius:10px;

    -moz-box-shadow:2px 2px 0 #c2c2c2;
    -webkit-box-shadow:2px 2px 0 #c2c2c2;
    box-shadow:2px 2px 0 #c2c2c2;
}

.comment .avatar{

    /*
    /   The avatar is positioned absolutely,
    /   and offset outside the comment div
    /*/

    height:50px;
    left:-70px;
    position:absolute;
    width:50px;
    background:url('img/default_avatar.gif') no-repeat #fcfcfc;

    /* Centering it vertically: */

    margin-top:-25px;
    top:50%;

    -moz-box-shadow:1px 1px 0 #c2c2c2;
    -webkit-box-shadow:1px 1px 0 #c2c2c2;
    box-shadow:1px 1px 0 #c2c2c2;
}
The .comment divs and the #addCommentContainer are styled at once because they share most of the styling. A number of CSS3 rules are applied, including rounded corners and a box-shadow. Needless to say, these do not work in older browsers, but as they are purely presentational, the script will still work without them.
styles.css - Part 2
.comment .avatar img{
    display:block;
}

.comment .name{
    font-size:20px;
    padding-bottom:10px;
    color:#ccc;
}

.comment .date{
    font-size:10px;
    padding:6px 0;
    position:absolute;
    right:15px;
    top:10px;
    color:#bbb;
}

.comment p,
#addCommentContainer p{
    font-size:18px;
    line-height:1.5;
}

#addCommentContainer input[type=text],
#addCommentContainer textarea{

    /* Styling the inputs */

    display:block;
    border:1px solid #ccc;
    margin:5px 0 5px;
    padding:3px;
    font-size:12px;
    color:#555;
    font-family:Arial, Helvetica, sans-serif;
}

#addCommentContainer textarea{
    width:300px;
}

label{
    font-size:10px;
}

label span.error{
    color:red;
    position:relative;
    right:-10px;
}

#submit{

    /* The submit button */

    background-color:#58B9EB;
    border:1px solid #40A2D4;
    color:#FFFFFF;
    cursor:pointer;
    font-family:'Myriad Pro',Arial,Helvetica,sans-serif;
    font-size:14px;
    font-weight:bold;
    padding:4px;
    margin-top:5px;

    -moz-border-radius:4px;
    -webkit-border-radius:4px;
    border-radius:4px;
}

#submit:hover{
    background-color:#80cdf5;
    border-color:#52b1e2;
}
In the second part of the stylesheet, we style the comment and form elements. Notice the input[type=text] selector, which selects elements depending on the type attribute.
Step 4 - jQuery
Now lets continue with jQuery, which is the last step of this tutorial. After including the library to the bottom of the page (best for the perceived performance of the page) we can start coding the script file.
script.js
$(document).ready(function(){
    /* The following code is executed once the DOM is loaded */

    /* This flag will prevent multiple comment submits: */
    var working = false;

    /* Listening for the submit event of the form: */
    $('#addCommentForm').submit(function(e){

        e.preventDefault();
        if(working) return false;

        working = true;
        $('#submit').val('Working..');
        $('span.error').remove();

        /* Sending the form fileds to submit.php: */
        $.post('submit.php',$(this).serialize(),function(msg){

            working = false;
            $('#submit').val('Submit');

            if(msg.status){

                /*
                /   If the insert was successful, add the comment
                /   below the last one on the page with a slideDown effect
                /*/

                $(msg.html).hide().insertBefore('#addCommentContainer').slideDown();
                $('#body').val('');
            }
            else {

                /*
                /   If there were errors, loop through the
                /   msg.errors object and display them on the page
                /*/

                $.each(msg.errors,function(k,v){
                    $('label[for='+k+']').append('<span class="error">'+
                        v+'</span>');
                });
            }
        },'json');

    });

});
Starting from the top, we have the $(document).ready() call, which binds a function to the DOM content loaded event. The working variable acts as a flag, which tells the script if an AJAX request is in progress (thus preventing double posting).
In the callback function for the POST AJAX request, we check the status property to determine whether the comment was successfully inserted. If it was, we add the received markup to the page after the last comment with a slideDown animation.
If there were problems, we display the error messages by appending an error span to the appropriate label element (the for attribute of the label contains the id of the input that caused the error).
With this our Simple AJAX Commenting System is complete!
Conclusion
To be able to run this script on your server, you need to create the comments table in your MySQL database. You can do this by executing the SQL code found in table.sql from the SQL tab of phpMyAdmin. After this you need to enter your MySQL connection details in connect.php.
You are free to modify and use this code any way you see fit.
What do you think? How would you improve this script?
Bootstrap Studio
The revolutionary web design tool for creating responsive websites and apps.
Learn more
Men, no one commented in this section lol, that show you that you did a great work.
Great tutorial! I noticed that you're not lower-casing emails before hashing them though, as specified here: http://en.gravatar.com/site/implement/hash/
Other than that, looks great!
Everyone keep commenting on 'your' comment system. I read all the tutorial and seems very simple and functional. Congratulation. Maybe an option to post the same comment to facebook will be very useful in 2.0.
@ Beau
Thank you for pointing this out. I fixed the tutorial and the demo.
Also thank you guys for providing this great service!
Great work, i'm impressed with what you did there, nevertheless, i have challenges on how to make the comments appear on other webpage that uses thesame url on realtime. it's only appears when refresh the page. it there any way you can put me through, i need something like that where a price can be change from the system back-end, while the users get the update on realtime.
Thanks..
Very amazing! I wonder if I can use it can be used on regular static pages (but more than one). I guess this is like cheating the system if you're stuck with static html pages.
So if you have a couple of pages that includes the demo.php, what do you need to change in order to have separate comment pages?
I'm not so great with php and MySQL but I believe I may need to create another table and duplicate demo.php and change things accordingly, is that right? Any help is appreciated here.
You would need to have an unique ID for every page that uses this comment script. Then you can tell the script to only list comments with the specific ID
Awesome! Is there an easy for an admin to be notified when a new comment is submitted?
Nice system.
Admin , Pagination and database integration would make this ideal. Good tut nonetheless
Yup something like this very comments box (the one used for the real comments in the site) is what we're looking for :D
Awesome tutorial many thank !!
Its awesome! THANKS DUDE! keep it up. its alot like the twitter type of website though.
Nice. Thanks for sharing :)
Thanks for the great comments folks!
@e11world
To make comments appear on different pages of your website (without getting mixed up), you'll need to add a new column to the database, something like 'page_id'.
After this you will need to assign each page a unique ID number by which you will distinguish it from the others (the best option is to use the same ID your CMS has assigned to the page).
When you insert a comment, you will have to add this ID as well. To show the comments for this particular page, just add a WHERE clause to the SELECT query in demo.php:
Hope this gives you a head start.
@ Pippin
To get notified when a comment is added, you can add a call to the mail() PHP function in submit.php (around line 39).
Can you guys explain to my how $arr is filled with the ajax post variables in submit.php ?
$arr is cleared before its send to the validate function?
$arr = array();
$validates = Comment::validate($arr);
Thank you for asking, Johan.
The Comment::validate() method uses the filter_input() function (part of PHP as of version 5.2.0), to validate and fetch the POST variables that were sent to submit.php.
The validate method takes $arr by reference, and fills it with either the validated (and sanitized) input, or the error messages.
So in other words, in these two lines:
$arr = array();
$validates = Comment::validate($arr);
We create an empty array, which is populated with data by the validate() method.
As I write this I realize that I should have probably named it differently (because it does not only validate but also fetch the data).
Great implementation and tutorial on a comment system.
Awesome mate!
Your class != OO
Impressive tutorial though.
coooooooooooooool!! can it be modified for wordpress.
coool I like IT....
why you put .avatar out the div comment ...?
thanks
How i can input a Captcha code ? in submit.php comment.class.php ?
Now this is super useful. Does it keep the name and email when they revisit the website?
One last thing, how would someone add an avatar? I couldn't find an option for that.
i love it !
transform this into a wordpress plugin :P ( i would but i don't know php / wordpress coding )
( will bring more traffic :D )
Really cool, danke :)
hi! nice tut! im having a problem, when i integrate this to my site it doesn't allow to add comments and it just refreshes when i submit..i just copy the code and paste it below my page..please help! thanks!
Im having same problem and cant find an answer here...
In Firefox Developer, it is saying that script.js TypeError: msg is null .. anyone have a clue?
best tutorial website!! thx
Really great job.
Is somebody have an idea to insert new comment at the top of the page?
@ Remix
To make the comment appear on the top of the page, you first have to make the latest comments show on the top. Change this line of demo.php:
$result = mysql_query("SELECT * FROM comments ORDER BY id ASC");To:
$result = mysql_query("SELECT * FROM comments ORDER BY id DESC");After this you will have to make jQuery put the comment at the top. Change line 30 of script.js from:
$(msg.html).hide().insertBefore('#addCommentContainer').slideDown();To:
$(msg.html).hide().prependTo('#main').slideDown();They allways output the Values at the Fields, why ?
0grish
Thanks Martin.
I could not find the proper JS line.
I continue with an idea. It should be great to have an edit and/or cancel function on comment, somewhat like Todo List, maybe by using session or adding a password field.
Hey guys, I've having an issue here. The comment goes to my table but it doesn't post to the site until I hit the refresh button...it's at http://www.jesseandshelly.com/demo/demo.php
You have a problem with the path of your comments.js file:
Just replace
src="js/comments.js"
by
src="../js/comments.js">
or move you file.
Sorry, a little problem with script tag, is anybody could delete my last two messages?
what should i add in submit.php to automatically insert $theIDofThePage into page_id column? coz comment disappears after refresh if $theIDofThePage is set to "111" and page_id column is by default 0
Thanks a lot ! I'm going to use many scripts from your site.
Great site !!!
@ 0grish
It looks fine from the code you've given. Can you share a link?
@ ezo
Add the new field to the mysql insert query in submit.php:
mysql_query(" INSERT INTO comments(name,url,email,body,page_id) VALUES ( '".$arr['name']."', '".$arr['url']."', '".$arr['email']."', '".$arr['body']."', '".$theIDofThePage."' )");This is great. I added the mail() function, however I would like to see the name, email and body content in the email that is sent to me. How is that possible? This is what I added:
$message = "A Comment has been added to the website.";
wordwrap()
$message = wordwrap($message, 70);
// Send
mail('[email protected]', 'Comment has been added', $message);
I'm also trying to add reCaptcha. I currently added in the demp.php page.
Is this correct?
I really like the tut and the script! Just one thing; If you have over a 1000 comments, the page would be enormous. Is it easy to implement a "read more" button on the bottom of the page?
So you show the first 50 comments, and 50 more with every click on that button.
Note. Comments are already ordered descending by ID and the submitform is on top of the page.
To add to my previous post, Just like Twitter....
[21-Jul-2010 12:33:49] PHP Fatal error: Call to undefined function mb_strlen() in /home/****/public_html/demo/comment.class.php on line 127
im not sure why im getting this message in my error log - can someone tell me if ive missed something - thank you for your great work
@ Rocky Patel
You can send them along with the text of the email.
$msg = "
A new comment was added!
Name: ".$arr['name']."
Email = ".$arr['email'];
mail('[email protected]','Subject',$msg)
@ alex
You are missing the MB PHP extension. It is required for multibyte string support (alphabets different from latin). I you can fix this by either installing the extension, or replacing the call to the mb_strlen() function with strlen() (do not forget to remove the second 'utf-8' parameter);
Really confusing codes etc. Anyway i'll try apply it to my wordpress commenting system later. See whether it works or not. Thanks for sharing anyway! Great post.
I am having difficulty in blocking the comments by IP.
If you already have an IP on a particular news story, and it is locked status with the commentary will not be added.
Thank you.
Sorry my english
Blocked it already is, I already put to enter the status in 'N', but do not want a blocked IP to send a new message.
that worked great thanks
Captcha:
demo.php
ATUALIZAR CODIGO
Codigo:
================================
comment.class.php
if(!($data['captcha'] = ($_SESSION['security_code']) AND $_POST["captcha"] == $_SESSION['security_code']))
=============================
submit.php
Line 2 INCLUDE:
session_start();
Line 25 INCLUDE:
// IMPEDE DUPLO ENVIO
unset($_SESSION['security_code']);
Creat page CaptchaSecurityImages.php and include:
// CONFIG
$font = "VeraSeBd.ttf";
//$signature = "nome do site";
$perturbation = 1.0; // bigger numbers give more distortion; 1 is standard
$imgwid = 200; // image width, pixels
$imghgt = 100; // image height, pixels
$numcirc = 4; // number of wobbly circles
$numlines = 3; // number of lines
// END CONFIG
// global vars
$ncols = 20; // foreground or background cols
// end global vars
function frand()
{
return 0.0001*rand(0,9999);
}
// wiggly random line centered at specified coordinates
function randomline($img, $col, $x, $y)
{
$theta = (frand()-0.5)M_PI0.7;
global $imgwid;
$len = rand($imgwid0.4,$imgwid0.7);
$lwid = rand(0,2);
$k = frand()0.6+0.2; $k = $k$k0.5;
$phi = frand()6.28;
$step = 0.5;
$dx = $stepcos($theta);
$dy = $stepsin($theta);
$n = $len/$step;
$amp = 1.5frand()/($k+5.0/$len);
$x0 = $x - 0.5$lencos($theta);
$y0 = $y - 0.5$len*sin($theta);
$ldx = round(-$dy$lwid);
$ldy = round($dx$lwid);
for ($i = 0; $i < $n; ++$i) {
$x = $x0+$i$dx + $amp$dysin($k$i$step+$phi);
$y = $y0+$i$dy - $amp$dxsin($k$i$step+$phi);
imagefilledrectangle($img, $x, $y, $x+$lwid, $y+$lwid, $col);
}
}
// amp = amplitude (<1), num=numwobb ( 0)
$dphi = 1/(6.28$r);
$woffs = rand(0,100)0.06283;
for ($phi = 0; $phi < 6.3; $phi += $dphi) {
$r1 = $r (1-$amp(0.5+0.5sin($phi$num+$woffs)));
$x = $xc + $r1cos($phi);
$y = $yc + $r1sin($phi);
imagefilledrectangle($img, $x, $y, $x+$wid, $y+$wid, $col);
}
}
// make a distorted copy from $tmpimg to $img. $wid,$height apply to $img,
// $tmpimg is a factor $iscale bigger.
function distorted_copy($tmpimg, $img, $width, $height, $iscale)
{
$numpoles = 3;
// make an array of poles AKA attractor points
global $perturbation;
for ($i = 0; $i = $width0.3 && $px[$i] = $height0.3 && $py[$i] <= $height0.7);
$rad[$i] = rand($width0.4, $width0.8);
$tmp = -frand()0.15-0.15;
$amp[$i] = $perturbation * $tmp;
}
// get img properties bgcolor
$bgcol = imagecolorat($tmpimg, 1, 1);
$width2 = $iscale$width;
$height2 = $iscale$height;
// loop over $img pixels, take pixels from $tmpimg with distortion field
for ($ix = 0; $ix < $width; ++$ix)
for ($iy = 0; $iy < $height; ++$iy) {
$x = $ix;
$y = $iy;
for ($i = 0; $i $rad[$i])
continue;
$rscale = $amp[$i] sin(3.14$r/$rad[$i]);
$x += $dx$rscale;
$y += $dy$rscale;
}
$c = $bgcol;
$x = $iscale;
$y = $iscale;
if ($x >= 0 && $x = 0 && $y < $height2)
$c = imagecolorat($tmpimg, $x, $y);
imagesetpixel($img, $ix, $iy, $c);
}
}
// add grid for debugging purposes
function addgrid($tmpimg, $width2, $height2, $iscale, $color) {
$lwid = floor($iscale3/2);
imagesetthickness($tmpimg, $lwid);
for ($x = 4; $x < $width2-$lwid; $x+=$lwid2)
imageline($tmpimg, $x, 0, $x, $height2-1, $color);
for ($y = 4; $y < $height2-$lwid; $y+=$lwid*2)
imageline($tmpimg, 0, $y, $width2-1, $y, $color);
}
function warped_text_image($width, $height, $string)
{
// internal variablesinternal scale factor for antialias
$iscale = 3;
// initialize temporary image
$width2 = $iscale$width;
$height2 = $iscale$height;
$tmpimg = imagecreate($width2, $height2);
$bgColor = imagecolorallocatealpha ($tmpimg, 21, 21, 21, 100);
$col = imagecolorallocate($tmpimg, 231, 231, 231);
// init final image
$img = imagecreate($width, $height);
imagepalettecopy($img, $tmpimg);
imagecopy($img, $tmpimg, 0,0 ,0,0, $width, $height);
// put straight text into $tmpimage
global $font;
$fsize = $height2*0.25;
$bb = imageftbbox($fsize, 0, $font, $string);
$tx = $bb[4]-$bb[0];
$ty = $bb[5]-$bb[1];
$x = floor($width2/2 - $tx/2 - $bb[0]);
$y = round($height2/2 - $ty/2 - $bb[1]);
imagettftext($tmpimg, $fsize, 0, $x, $y, -$col, $font, $string);
// addgrid($tmpimg, $width2, $height2, $iscale, $col); // debug
// warp text from $tmpimg into $img
distorted_copy($tmpimg, $img, $width, $height, $iscale);
// add wobbly circles (spaced)
global $numcirc;
for ($i = 0; $i < $numcirc; ++$i) {
$x = $width (1+$i) / ($numcirc+1);
$x += (0.5-frand())$width/$numcirc;
$y = rand($height0.1, $height0.9);
$r = frand();
$r = ($r$r+0.2)$height0.2;
$lwid = rand(0,2);
$wobnum = rand(1,4);
$wobamp = frand()$height*0.01/($wobnum+1);
imagewobblecircle($img, $x, $y, $r, $lwid, $wobamp, $wobnum, $col);
}
// add wiggly lines
global $numlines;
for ($i = 0; $i < $numlines; ++$i) {
$x = $width (1+$i) / ($numlines+1);
$x += (0.5-frand())$width/$numlines;
$y = rand($height0.1, $height0.9);
randomline($img, $col, $x, $y);
}
return $img;
}
function add_text($img, $string)
{
$cmtcol = imagecolorallocatealpha ($img, 128, 0, 0, 64);
imagestring($img, 5, 10, imagesy($img)-20, $string, $cmtcol);
}
// start main program
session_start();
// generate 5 letter random string
$rand = "";
// some easy-to-confuse letters taken out C/G I/l Q/O h/b
//$letters = "ABDEFHKLMNOPRSTUVWXZabdefghikmnopqrstuvwxyz";
$letters = "1234567890";
for ($i = 0; $i
=========================
Obrigado a todos
Hi, first of all congratulations for this great post ! this commenting system is really coool !
I'm trying to put unique ID on each page, i'v already add a new field to the mysql table like this :
mysql_query(" INSERT INTO comments(name,url,email,body,page_id)
VALUES (
'".$arr['name']."',
'".$arr['url']."',
'".$arr['email']."',
'".$arr['body']."',
'".$theIDofThePage."'
)");
But i can't find where i should define $theIDofThePage ???
Thanks for your help
@ Orion
The id of the page is just a unique number which you use to distinguish one page from the other. Depending on your CMS, this might be something like a get_the_ID() (in wordpress).
If you are using your own solution, you may use the primary key that is assigned by mysql when inserting the page info into your database.
If you have a PHP site, but do not rely on a database, you can just manually add a unique id to each of your pages. For example if you have an about.php page, you can set:
at the top of the file. In a different page, say reviews.php, you can set $theIDofThePage to be 2 etc.
Thanks for another great script.
I'm linking comments to other content in my database (like orion and ezo above). So I've added content_id to my comments table so I can do the join in my comment retrieve select to only get the comments linked to the content_id.
I pass the content_id to my comments page to retrieve existing linked comments and these display fine. When I add a new comment my insert statement in submit.php includes the content_id but my problem is that the insert does not insert this column.
I assume it's because the content_id passed to the first page (to do the retrieve) is not being passed to submit.php (to be referenced in the insert). Does anyone have a suggestion as to how to solve this?
Thanks for yor work.
People like you realy help amateur web designers, programmers.
I wish to all beginers meet with your helpfull site.
IT is pretty good only lake of pagination
thx though
Thats alot of work, to create a commenting system, CAN SAY ENOUGHT ABOUT TUTORIALIZINE "GREAT JOB YOU GUYS"
when I opend the demo.php this is on top of tha add comment box.
What am I doing wrong?
markup(); } ?> o
never mine I figure it out.
Hi,
First of all thanks for such an amazing tutorial.
Now I would love to implement a version of this on a site I'm making, the problem is I need to add 2 new fields, I can get the whole system to publish a comment to show the name and comment body and date but not the 2 new fields I add to the form..where else do I have to add the new fields info??
Thank so much in advance to anyone who can help.
I know that its not nice to ask for help of this kind, but this won't work with me. Any of the other tutorials of this nature that I follow don't seem to work with me. My host is GoDaddy.
Please help me!
Awesome, 2 mins to install and setup. ;o)
Would I be able to keep the same function but with a css I already have instead?
This is great! I have a site done without a CMS and so I can use this to add a little more interaction to it.
Thank you!!
I have a problem.
I hit submit, the button switches caption to 'working...' and the comments don't appear till i refresh the page.
I tried the fix posted above by remix but it still won't work.
Please help! this is a great comments system but i'll have to remove it if i can't get it to work 100%
The easiest way is to debug debug it using Firebug on Firefox, or the developer console in other browsers. These are useful tools for web developers and it will be really helpful for you to learn how to use them.
perhaps u need to add submit.php
but i am not sur. in all case u have to use firebug on Firefox to fix this.
Thanks Martin for all your answers on this great tutorial.
A couple of problems I'm still running into:
Added $result = mysql_query("SELECT * FROM comments WHERE page_id = '.$theIDofThePage.' ORDER BY id ASC"); to demo.php and the mysql_query(" INSERT INTO comments(name,url,email,body,page_id)
VALUES (
'".$arr['name']."',
'".$arr['url']."',
'".$arr['email']."',
'".$arr['body']."',
'".$theIDofThePage."'
)");
and I also added $theIDofThePage = 1; to my page and 2 for another.
The page_id in the mysql db is not populating at all or giving me null or 0 sometimes (so I guess it's not getting the last part of my code here. Also when I refresh or go back to the page, all comments are gone.
Not sure what I did also at the end but now I'm getting double comments when I submit but this could be fixed if I undo somethings anyway so not as big of an issue.
Any help is much appreciated and I know a few others here might appreciate this as well. Thanks to anyone who can contribute!
the second piece of code is what I modified on the submit.php page and I fixed the duplicate comment. Now just that comments not displaying after refresh and page_id is not getting any value in the database (its fields are empty for all comments entered).
Use cookies for page_id variable.
Hi all,
First off, amazing code Martin! Excuse me for the long post...
I've been trying to customize your code to get it working not only on multiple pages, but also multiple times on each page (kind of like WordPress has it).
The submit.php code has been added to the index.php file.
See code below:
The table has been customized like so:
This is the HTML code for each form after each news block:
I've tried my very best to get the same code as mentioned in the above comments to get the comments working on multiple page, while referencing the $theIDofThePage = 1 but this hasn't been working for me.
Anybody have a clue how to get this working correctly?!?
I just noticed that my original post did not provide all the code correctly from the demo.php page (index.php)
Hoping this time it works, here it is:
(php code)
Hey, very nice tutorial....works a charm. I don't know if I'll get any response to this but anyways, does anyone know of a way that the sliding mechanism could work the opposite way. So that instead of the comment form sliding down to reveal the comment, would it be possible for me to change it so that the comment box stays where it is and farts out a comment...kind of like the way YouTube does it. I'm guessing it requires some messing around with the script.js file but I have only just started learning JavaScript.
Thanks in advance if anyone has any ideas
Hi Danny!
You are absolutely right, you have to just change a little thing in "script.js" to make the sliding mechanism work in opposite direction.
Open script.js in any text editor and go to line number 30, I am pasting it below:
$(msg.html).hide().insertBefore('#addCommentContainer').slideDown();
you have to change "insertBefore" to "insertAfter" in above line, so it will become:
$(msg.html).hide().insertAfter('#addCommentContainer').slideDown();
If you need any assistance, feel free to contact me via live chat feature on my website http://www.79xperts.com/
Regards
Adnan Saeed
Thanx for this useful post.
Anybody can help me? After uploading it to my server its show this massage:
Warning: mysql_fetch_assoc(): supplied argument is not a valid MySQL result resource in /home/designfx/public_html/durniti/blog/index.php on line 17
and data is not saving to mySQL table (i can post, but once refresh comment is not there anymore)
Regards,
Hi Tofazzal!
Apparently, it seems to be a database connection error. Are you sure that you have made a connection with mySQL database successfully?
Regards
Adnan Saeed
Thanx Adnan. Sorry to say that i don't know how to check mySQL database is connected properly? (DB details, like username and password was correct - and import mySQL table which is attached with download script bundle supplied here). Please tell me how to do it.
Nice script... clean and clear...
Unfortunately after spending a day integrating this offline, where it works fine on a MAMP server. it doesn't work online, using exactly the same script and database (with relevant connections).
Even the demo folders doesn't work online. When the submit button is clicked the 'working..' button appears and hangs.(on two separate servers that work for all other jquery)
I have tried everything but cannot seem to overcome this.
Any help would be appreciated.
Hello Martyn.
I've been exploring the different documents with my prog teacher... We've been noticing that the error comes from this line in script.js :
$.post('submit.php',$(this).serialize(),function(msg){
We've noticed that the comment you want to add, isn't yet called in submit.php (It means that when you want to send a comment, the script blocks it).
I have the same problems as you and even my teacher doesn't know the problem... You should focus on this line. Sorry if I can't really help at all, but I just wanted to say that this line, is actually the problem. You can try to analyse where is your error with the command ALERT in your jscript.
@Marth & @Martyn: I have the same problem. The script runs fine locally, but 'hangs' on the actual Internet webserver, where an EMPTY record is added to the database.
I have spent the whole day (no joke) to figure this out, but I'm stuck. Could you fix the problme at the end? Any help would be greatly appreciated, or I will have to go with another script (though I love this one, it's really smooth .. but of course it has to run on the web, only locally is not enough ;)).
Or do you have any idea, Martin?
p.s. PHP version on the webserver is 5.2.6-1, and 5.3.8 locally.
very nice work!
In the validate function there is
validation for the lenth of the body. How to make a few more validations of the body, and different errors output depending on the if statement? Thanks :)
$comments = array();
$result = mysql_query("SELECT * FROM comments
WHERE page_id = ".$theIDofThePage." ORDER BY id ASC");
got it working only like this:
$comments = array();
$result = mysql_query("SELECT * FROM comments
WHERE page_id = '".$theIDofThePage."' ORDER BY id ASC");
single And double quotes
Thanks! This is great. I will try to add this to one of my sites on multiple pages.
Hi, I get all the code but where do we connect to the database you say put the details in connect.php but I don't see this above?
Hey!
Thank you for this, such a sweet comment system :)
I'm facing some problems with charsets in it.
I'm norwegian, so i need support for "æ ø å" . when commenting with these letters, the json markup will show it perfectly. but when its submitted to database it turns to this : æøå.
I'm trying to set headers etc, but no luck. could you please push me in the right direction?
its latin-8859-1.
Any pointers greatly appreciated =)
You need to make sure that your database is using unicode for the script to work. If your text fields use any other encoding, you will end up with the strange symbols you've observed.
Hello @martin angelov
i don't want to use the name label
(because i want a comment system for people who registered)
How can i remove the
if(($data['body'] = filter_input(INPUT_POST,'body',FILTER_CALLBACK,array('options'=>'Comment::validate_text'))))
and the
if (($data['name'] = filter_input(INPUT_POST,'name',FILTER_CALLBACK,array('options'=>'Comment::validate_text'))))
in such a way that i can still fetch it and use it
for my website?
hidden fields
Really sweet commenting system! Thank you so much. Would anyone know how to add a reply button so that you can reply directly to a specific comment?
Any help is greatly appreciated!!!
At last someone wrote a sensible simple AJAX comment system with small overhead.
Just hacked this into a custom Wordpress blog (nightmare job) and its running sweet.
Big thanks
Hey, can you provide some insight as to how it went with WordPress? Did you do nested comments?
Thanks for you code , but I would like to enhance it with reply to comments,admin enabling comment,comment voting . How can I do it?
Hey somebody, I would like to do the same thing. I'm hoping that Martin might chime in on this as well
Hello,
I faced a problem, If I added a comment I want it to appear to other visitor without "Refreshing" the page as I see it when I added it.
Sorry for bad English, I hope you got what I think off.
Waiting a solution.
Thanks,
nice script. but it does not offer captcha in it. u should also integrate captcha into it.
This script beautifully combines with this captcha: link
Demo here: link
Sorry - changed the site, so demo is not there anymore
With captcha using PHP, it will be very cool.
Its really disappointing that the multi page option does not work. It seems a lot of folks are having this problem too. Can anybody help with this??? I have tried all suggestions above and added the page_id = ".$theIDofThePage." in all variations and my--like everyone else's comments will not populate in the database and disappear on refresh?
Any Help. This is a really cool comment system that would be awesome on multi pages.
Thanks
Rob
Hi,
I have one small problem with this great script. I uploaded the demo and made sure it worked (which it did). But when I integrate it to my web page and proceed to add a new comment - not one, but two comments, are added. Any ideas as to this behavior?
Simple and Great one it helped me a lot
Hey man these are some awesome tut's I have a question though.. I am not to on top of this type of coding but how can I get this to be inside of a page I already have up now? where it works and doesn't mess with my .css sheet I already have?
thanks for tutorial. anyway how do you add different comment's eg (comment's for lesson 1 and lesson 2 should i have to build two database and pages with different names)
Once again, I need a nice tutorial for a small project im doing and your site has it. Awesome work Martin, keep it up!
Could you please give me a simple way to get a url that is in the below format from a jquery or web browser.
index.php?id=1&user=grace&go=yes
The major problem that i have been facing is that, if a user submits a url the is in that formation in a comment, from here &user=grace&go=yes will be lost
Can you help me on how to get the complete index.php?id=1&user=grace&go=yes submitted in a comment? I am working on a different comment system and not this yours
being new to this i wonder if it could be added to my site , the problem i see is I use .tpl files for the layout , how to i get it to work with php and tpl's? any help would be greatly appreciated
sorry i should be more specific
if i leave the page then come back to it the existing comments don't appear anymore
the problem is this bit of code i don't know how to send that to the .tpl file
foreach($comments as $c){
echo $c->markup();
}
sorry for being dumb but i would really love this to work , i have it working with unique page id's and getting the users avatar off my site not off gravatar with a default avatar showing if they haven't uploaded 1 , comments appear correctly when you enter them it's just they aren't there when i come back to the page any help would be greatly appreciated thanks
First thanks for the great tutorials here,
I'm make this to work on my site ,but there is any chance to make links clickable in comments?
For anyone who's having trouble using this as multi pages, playing around with the script, I've been able to figure it out.
In the form, set a hidden field with a name of your choice (I used "product_id") and I set the value to the ID that's found in the site url. (For each of my products, it has a unique ID number. I just used the $_GET['id'] fuction for PHP to store it as value in my hidden field.)
In your mysql table, add a new field to store the page values. (I called mines product_id.)
Then, open up the submit.php document. In the mysql_query function, add the field name into the grouping and then in its corresponding place for the values, put '".$_POST['product_id']."', replacing 'product_id' with the name of the hidden value field on your form.
This did the trick for me. I hope it helps you out too.
Thank you man, i spent many hours trying to detect how to "pass" hidden values, and the POST is the solution. I thought the "arr" had the problem.
thank you!
hi i really would like to know how you got your miltiple pages setup in detail cheers
Awesome!!! this trick worked fine for me :)
Hi,
First off all, great script. I use it for my website and it works like a charm. I have 1 question, is it possible to make the comments refresh automatically? So if another user posts a comment after you loaded the page that you can see that without having to hit f5?
Thanks!
great tutorial
Hello & thanks for this great tutorial!
After 2 straight days of testing, thought I'd finally gotten it to work for 3 sections on the same page...each with a different "grade_id" to separate them. Although comments appear, they are in all 3 sections instead of only one. They then disappear upon a page refresh & have not been entered into the DB.
I cannot find any js or php errors to work from at this point...and have nil jquery skills.
Any ideas? Thanks in advance. ;-)
how to add form to add photos to comment? please tell me, is very necessary
In case you wonder, I created an automatic LOCATION textfield.
Include this in demo.php and register your api key in ipinfodb.com:
<?
// IP Address of the guest
$ip = $_SERVER['REMOTE_ADDR'];
//echo "<b>IP Address= $ip</b><br />";
$your_key = 'yourkey';
$url = "http://api.ipinfodb.com/v3/ip-city/?key=$your_key&ip=$ip&format=json";
$data = json_decode(file_get_contents($url));
$guest_ip = ucwords(strtolower($data->cityName.', '.$data->countryName));
?>
Then in demo.php:
<label for="location">Città / Your Location</label>
<input type="text" name="location" id="location" readonly="yes" value="<? echo $guest_ip ?>" />
Final version with all the mods I added: http://www.flapane.com/guestbook/guestbook.php
Tzine, thanks a lot!
I also added a Facebook Connect button which fetches Name, Email, Avatar and Web address.
Furthermore I permanently solved the "multiple page" issue by using this, so I can load 9 comments per time: http://www.9lessons.info/2009/12/twitter-style-load-more-results-with.html
Hello Flapane, could you please share the code you use to fix the multipage issue and the rest of the important updates you made?
Thank you
Hi there, sorry for late answer, but in the next week-end I'm gonna post a tutorial on my blog with detailed explainations regarding the twitter like stream, the captcha code and the automatic location system.
Done it (together with backtrack link to this guide)
http://www.flapane.com/blog/2012/09/howto-guestbookcomment-system-in-ajax-e-php-con-un-pizzico-di-twitter/
Hello, I passed the tutorial, and I added a captcha and paging messages and I made a second version with a style captcha generating random characters that I check in the file comment.class.php and I would do a tutorial on my site in French soon, thank you sharing
Excellent script, I'm thinking of implementing it in my personal website.
Is there a way to have multiple instances of this form on the SAME page? I can't seem to make this work.
Thanks for your help.
Excellent man!!!
Thanks alot, it helps me alot in one of my projects.
thank you guys. good ajax commenting system.
Hi! Need this plugin for Wordpress!
Extremely helpful, exactly what I was looking for. Thank you so much!
This is the error i get . Warning: mysql_fetch_assoc() expects parameter 1 to be resource, boolean given in C:\xampp\htdocs\MwiriICT\demo.php on line 17. how can i solve it.
Is there a way to display somewhere on the page how many comments have been posted already ? For example : "Comment (8)"
How do we do that ?
Hi.
Thanks for the plugin, its pretty... but i have a problem :S.
Im trying customize this plugin for jQuery Mobile, with id_page filter, but when the comment is sended, appears for a couple of seconds and refresh the page without "?id=X" in the url.
Can you help me please? Thanks!!
Nice tutorial.
I have one comment:
As a user you can add blank comments by submitting just a space.
I fixed this by adding a trim function on line 7 of part 3 of the class. So:
if(mb_strlen($str,'utf8')<1)
becomes:
if(mb_strlen(trim($str),'utf8')<1)
hi great tutorial, just one question im having issues with comments staying on the page once you refresh the page. any help??
Hi all
great tutorial! I used it for my website and work perfectly. Like Flapane, I permanently solved the "multiple page" issue (load 10 comments per time) with a page refresh when you post a comment. I also arranged the calendar.
Thank you for this great tutorial i will be using it for my website :) and it works perfectly .
How do you escape single quotes without addslashes??
Thanks.
hey, i just try on localhost and it work perfectly. but when i try on my website it become stuck when click button submit it say working.. but stuck at all, data not saved to database. I have configured connection, check another possibilities but it keep not work. please help me?
Victor probably your host server is old so ---> php or Apache is not updated and can make some trouble .. :P
And i want to TY Martin Angelov, for making this tutorial and making my job much easier to add and improve this comment system on my website
can add emoticons may be better
If someone needs this system, he surely has no just one single page which he wants to put it on. So we need a "multipage" version of this system.
Also, it's very risky to receive any comment without at least captcha included.
Angelov, please complete your job.
How about some gratitude ya douche. It's not his job to do ours for us, this tutorial can serve as a great foundation. Use your brain and work out the multipage version, and add a captcha, etc.
I can't believe some people.
great work,
Thanks.
Neat. Wonder if captcha or the like is necessary before running this on live server.
mysql_query(" INSERT INTO comments(
name,url,email,body,pageid,ip)VALUES (
'".$arr['name']."',
'".$arr['url']."',
'".$arr['email']."',
'".$arr['body']."',
'".$_SESSION['pageid']."',
'".$ip."'
)");
How about voting thumbs up or down and auto sorting comments by vote count, so the most up votet is in first place etc.. like nr1, nr2 etc. And comments in comments with + and - votes without autosortings? :D
hi martin, i am having a problem, when i use this on my local server, itsworking fine but when i run the following code on my website its getting an error, please help me
Hi, I would like to know (about simple AJAX Commenting System) how display the date in Italian, and how many comments display for page. Thanks.
Great Tutorial..Thanks.. :)
The only problem i have is to select where the comments are stored. The comments disappear after i refresh the page..
Otherwise it's great!
Are you storing them to a database Felix? Make sure that connect.php holds your database information. Also, not sure if you're trying to run it with the latest version of Jquery, since it won't work with it.
This does not work with the latest version of jquery library. Is there a more up to date version?
Hi Martin,
Just came across this tutorial and it's very useful, thanks for sharing. I'm trying to port it onto the latest Jquery version, and have been troubleshooting your comment.class.php, but without much luck. With the new version of Jquery, comments get stored fine in a database, but don't appear on the screen. Getting unrecognized expressions in "div class="comment" and "div class="avatar". Thanks for your help.
Zarko
Great job!! I will try to use in in my Website
Nice but any idea how can i make this real time i.e. Other guys commenting appears in real time as soon as they are published :)
For issues with multiple page comments follow these 3 steps:
1) The Sql Table would be:
Now in your Demo.php add a new hidden field just below the Email field:
<input type="hidden" name="page_id" value="786" />
3) Replace the My sql Query with these:
mysql_query(" INSERT INTO comments(name,url,email,page_id,body) VALUES ( '".$arr['name']."', '".$arr['url']."', '".$arr['email']."', '".$_POST['page_id']."', '".$arr['body']."' )");</i>your commenting system is really cool.... can u just show how to make nested replies for each comment.... Thank you
Yes, there seems to be a problem with the latest jquery version the interpretation of the json data on callback is causing problems for the function (append, hide).
Love the script btw.
Cheers,
Mark
Thanks for this, it was very helpful!
Wouldn't NoSQL be a better fit for large scale commenting database?
I was wondering if there is a way you can automatically hide the comments. But display them when you give aproval. Just incase of spams or misused messages.
Saved my life today,Thanks! Anyway to have a confirmation pop up show up once the form has validated? Something that would be like Wahoo! Thanks for commenting...
Hey, great tutorial. I installed by itself and ran locally using WAMP and it worked perfectly.
I'm now trying to get it to work inside a div on my page and am having some trouble. Initially it looks good...it displays the first comment I had made while in stand along mode, which makes sense since that info was input into the db, and it shows the "add a comment" box with the submit button..all that looks fine. When entering the info and hitting submit though the screen just flashes once and I'm looking at the same screen as before. Looking at the db I see that a new row has not been created.
I'm thinking this is a db connection issue? Another div on the page (banner/menu bar) has a line "include("../includes/sql.php");" that includes connection info. That gets fired on each page so I always have a db connection. I tried disabling the connect.php file used with the comment system thinking it wasn't necessary due to the fact I already had a db connection but that didn't get me any closer.
Any suggestions? Love the work you've done...and it's such a tease having it work for me locally by itself and not be able to clear the last hurdle now of implementing it on my site. Many thanks for any help you can give!
Hi,
Thanks for the very nice commenting system,
I have it working, but now I want to use PDO for security,
Could you please tell me were to change the code for this, I am stuck specially in the "comment.class.php" and "submit.php".
Thanks a lot.
how to add reply functions ?